DFHack Readme
Introduction
DFHack is a Dwarf Fortress memory access library and a set of basic tools that use it. Tools come in the form of plugins or (not yet) external tools. It is an attempt to unite the various ways tools access DF memory and allow for easier development of new tools.
Contents
- Introduction
- Getting DFHack
- Compatibility
- Installation/Removal
- Using DFHack
- Something doesn't work, help!
- The init file
- Commands
- Scripts
- modtools
- In-game interface tools
- Dwarf Manipulator
- Search
- AutoMaterial
- Stockpile Automation
- Track Stop Menu
- gui/advfort
- gui/assign-rack
- gui/choose-weapons
- gui/clone-uniform
- gui/companion-order
- gui/gm-editor
- Hotkeys
- Hotkeys
- Stockpile Automation
- Stockpile Automation
- gui/liquids
- gui/mechanisms
- gui/mod-manager
- gui/rename
- gui/room-list
- gui/guide-path
- gui/workflow
- gui/workshop-job
- Behavior Mods
Getting DFHack
The project is currently hosted on github at http://github.com/DFHack/dfhack
Older releases can be downloaded from here: http://dethware.org/dfhack/download
All new releases are announced in the bay12 thread: http://www.bay12forums.com/smf/index.php?topic=139553.0
Compatibility
DFHack works on Windows XP, Vista, 7, any modern Linux distribution, or OS X 10.6.8-10.9.
Currently, version 0.40.08 is supported (and tested). If you need DFHack for older versions, look for older releases.
On Windows, you have to use the SDL version of DF.
It is also possible to use the Windows DFHack with Wine under Linux and OS X.
Installation/Removal
Installing DFhack involves copying files into your DF folder. Copy the files from a release archive so that:
- On Windows, SDL.dll is replaced
- On Linux, the 'dfhack' script is placed in the same folder as the 'df' script
Uninstalling is basically the same, in reverse:
- On Windows, first delete SDL.dll and rename SDLreal.dll to SDL.dll. Then remove the other DFHack files
- On Linux, Remove the DFHack files.
The stonesense plugin might require some additional libraries on Linux.
If any of the plugins or dfhack itself refuses to load, check the stderr.log file created in your DF folder.
Getting started
If DFHack is installed correctly, it will automatically pop up a console window once DF is started as usual on windows. Linux and Mac OS X require running the dfhack script from the terminal, and will use that terminal for the console.
NOTE: The dfhack-run executable is there for calling DFHack commands in an already running DF+DFHack instance from external OS scripts and programs, and is not the way how you use DFHack normally.
DFHack has a lot of features, which can be accessed by typing commands in the console, or by mapping them to keyboard shortcuts. Most of the newer and more user-friendly tools are designed to be at least partially used via the latter way.
In order to set keybindings, you have to create a text configuration file called dfhack.init; the installation comes with an example version called dfhack.init-example, which is fully functional, covers all of the recent features and can be simply renamed to dfhack.init. You are encouraged to look through it to learn which features it makes available under which key combinations.
For more information, refer to the rest of this document.
Using DFHack
DFHack basically extends what DF can do with something similar to the drop-down console found in Quake engine games. On Windows, this is a separate command line window. On linux, the terminal used to launch the dfhack script is taken over (so, make sure you start from a terminal). Basic interaction with dfhack involves entering commands into the console. For some basic instroduction, use the 'help' command. To list all possible commands, use the 'ls' command. Many commands have their own help or detailed description. You can use 'command help' or 'command ?' to show that.
The command line has some nice line editing capabilities, including history that's preserved between different runs of DF (use up/down keys to go through the history).
The second way to interact with DFHack is to bind the available commands to in-game hotkeys. The old way to do this is via the hotkey/zoom menu (normally opened with the 'h' key). Binding the commands is done by assigning a command as a hotkey name (with 'n').
A new and more flexible way is the keybinding command in the dfhack console. However, bindings created this way are not automatically remembered between runs of the game, so it becomes necessary to use the dfhack.init file to ensure that they are re-created every time it is loaded.
Interactive commands like 'liquids' cannot be used as hotkeys.
Most of the commands come from plugins. Those reside in 'hack/plugins/'.
Patched binaries
On linux and OSX, users of patched binaries may have to find the relevant section in symbols.xml, and add a new line with the checksum of their executable:
<md5-hash value='????????????????????????????????'/>
In order to find the correct value of the hash, look into stderr.log; DFHack prints an error there if it does not recognize the hash.
DFHack includes a small stand-alone utility for applying and removing binary patches from the game executable. Use it from the regular operating system console:
- binpatch check "Dwarf Fortress.exe" patch.dif
- Checks and prints if the patch is currently applied.
- binpatch apply "Dwarf Fortress.exe" patch.dif
- Applies the patch, unless it is already applied or in conflict.
- binpatch remove "Dwarf Fortress.exe" patch.dif
- Removes the patch, unless it is already removed.
The patches are expected to be encoded in text format used by IDA.
Live patching
As an alternative, you can use the binpatch dfhack command to apply/remove patches live in memory during a DF session.
In this case, updating symbols.xml is not necessary.
Something doesn't work, help!
First, don't panic :) Second, dfhack keeps a few log files in DF's folder - stderr.log and stdout.log. You can look at those and possibly find out what's happening. If you found a bug, you can either report it in the bay12 DFHack thread, the issues tracker on github, contact me (peterix@gmail.com) or visit the #dfhack IRC channel on freenode.
The init file
If your DF folder contains a file named dfhack.init, its contents will be run every time you start DF. This allows setting up keybindings. An example file is provided as dfhack.init-example - you can tweak it and rename to dfhack.init if you want to use this functionality.
When a savegame is loaded, the onLoad.init file in its raw folder is run. It works the same way as dfhack.init. It is recommended that modders use this to improve mobility of save games.
Setting keybindings
To set keybindings, use the built-in keybinding command. Like any other command it can be used at any time from the console, but it is also meaningful in the DFHack init file.
Currently it supports any combination of Ctrl/Alt/Shift with F1-F9, or A-Z.
Possible ways to call the command:
- keybinding list <key>
- List bindings active for the key combination.
- keybinding clear <key> <key>...
- Remove bindings for the specified keys.
- keybinding add <key> "cmdline" "cmdline"...
- Add bindings for the specified key.
- keybinding set <key> "cmdline" "cmdline"...
- Clear, and then add bindings for the specified key.
The <key> parameter above has the following case-sensitive syntax:
[Ctrl-][Alt-][Shift-]KEY[@context]
where the KEY part can be F1-F9 or A-Z, and [] denote optional parts.
When multiple commands are bound to the same key combination, DFHack selects the first applicable one. Later 'add' commands, and earlier entries within one 'add' command have priority. Commands that are not specifically intended for use as a hotkey are always considered applicable.
The context part in the key specifier above can be used to explicitly restrict the UI state where the binding would be applicable. If called without parameters, the keybinding command among other things prints the current context string. Only bindings with a context tag that either matches the current context fully, or is a prefix ending at a '/' boundary would be considered for execution, i.e. for context foo/bar/baz, possible matches are any of @foo/bar/baz, @foo/bar, @foo or none.
Enabling plugins
Many plugins can be in a distinct enabled or disabled state. Some of them activate and deactivate automatically depending on the contents of the world raws. Others store their state in world data. However a number of them have to be enabled globally, and the init file is the right place to do it.
Most of such plugins support the built-in enable and disable commands. Calling them at any time without arguments prints a list of enabled and disabled plugins, and shows whether that can be changed through the same commands.
To enable or disable plugins that support this, use their names as arguments for the command:
enable manipulator search
Commands
DFHack command syntax consists of a command name, followed by arguments separated by whitespace. To include whitespace in an argument, quote it in double quotes. To include a double quote character, use \" inside double quotes.
If the first non-whitespace character of a line is #, the line is treated as a comment, i.e. a silent no-op command.
If the first non-whitespace character is :, the command is parsed in a special alternative mode: first, non-whitespace characters immediately following the : are used as the command name; the remaining part of the line, starting with the first non-whitespace character after the command name, is used verbatim as the first argument. The following two command lines are exactly equivalent:
- :foo a b "c d" e f
- foo "a b \"c d\" e f"
This is intended for commands like rb_eval that evaluate script language statements.
Almost all the commands support using the 'help <command-name>' built-in command to retrieve further help without having to look at this document. Alternatively, some accept a 'help'/'?' option on their command line.
Game progress
die
Instantly kills DF without saving.
forcepause
Forces DF to pause. This is useful when your FPS drops below 1 and you lose control of the game.
- Activate with 'forcepause 1'
- Deactivate with 'forcepause 0'
nopause
Disables pausing (both manual and automatic) with the exception of pause forced by 'reveal hell'. This is nice for digging under rivers.
fastdwarf
Controls speedydwarf and teledwarf. Speedydwarf makes dwarves move quickly and perform tasks quickly. Teledwarf makes dwarves move instantaneously, but do jobs at the same speed.
- 'fastdwarf 0 0' disables both
- 'fastdwarf 0 1' disables speedydwarf and enables teledwarf
- 'fastdwarf 1 0' enables speedydwarf and disables teledwarf
- 'fastdwarf 1 1' enables both
- 'fastdwarf 0' disables both
- 'fastdwarf 1' enables speedydwarf and disables teledwarf
- 'fastdwarf 2 ...' sets a native debug flag in the game memory that implements an even more aggressive version of speedydwarf.
Game interface
follow
Makes the game view follow the currently highlighted unit after you exit from current menu/cursor mode. Handy for watching dwarves running around. Deactivated by moving the view manually.
tidlers
Toggle between all possible positions where the idlers count can be placed.
twaterlvl
Toggle between displaying/not displaying liquid depth as numbers.
stockpile settings management
copystock
Copies the parameters of the currently highlighted stockpile to the custom stockpile settings and switches to custom stockpile placement mode, effectively allowing you to copy/paste stockpiles easily.
savestock
Saves the currently highlighted stockpile's settings to a file in your Dwarf Fortress folder. This file can be used to copy settings between game saves or players.
example:
` savestock food_settings.dfstock `
loadstock
Loads a saved stockpile settings file and applies it to the currently selected stockpile.
example:
` loadstock food_settings.dfstock `
To use savestock and loadstock, use the 'q' command to highlight a stockpile. Then run savestock giving it a descriptive filename. Then, in a different (or same!) gameworld, you can highlight any stockpile with 'q' then execute the 'loadstock' command passing it the name of that file. The settings will be applied to that stockpile.
Notes: It saves and loads files relative to the DF folder, so put your files there or in a subfolder for easy access. Filenames should not have spaces.
Limitations: Generated materials, divine metals, etc are not saved as they are different in every world.
rename
Allows renaming various things.
Options:
- rename squad <index> "name"
- Rename squad by index to 'name'.
- rename hotkey <index> \"name\"
- Rename hotkey by index. This allows assigning longer commands to the DF hotkeys.
- rename unit "nickname"
- Rename a unit/creature highlighted in the DF user interface.
- rename unit-profession "custom profession"
- Change proffession name of the highlighted unit/creature.
- rename building "name"
- Set a custom name for the selected building. The building must be one of stockpile, workshop, furnace, trap, siege engine or an activity zone.
command-prompt
A one line command prompt in df. Same as entering command into dfhack console. Best used as a keybinding. Can be called with optional "entry" that will start prompt with that pre-filled.

rendermax
A collection of renderer replacing/enhancing filters. For better effect try changing the black color in palette to non totally black. For more info see thread in forums: http://www.bay12forums.com/smf/index.php?topic=128487.0
Options:
- rendermax trippy
- Randomizes each tiles color. Used for fun mainly.
- rendermax light
- Enable lighting engine.
- rendermax light reload
- Reload the settings file.
- rendermax light sun <x>|cycle
- Set time to <x> (in hours) or set it to df time cycle.
- rendermax occlusionON|occlusionOFF
- Show debug occlusion info.
- rendermax disable
- Disable any filter that is enabled.
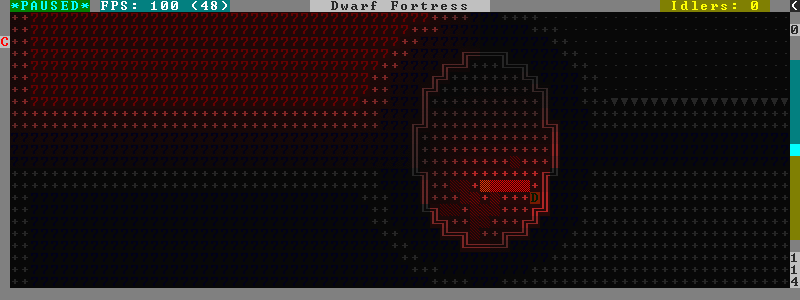
An image showing lava and dragon breath. Not pictured here: sunlight, shining items/plants, materials that color the light etc...
Adventure mode
adv-bodyswap
This allows taking control over your followers and other creatures in adventure mode. For example, you can make them pick up new arms and armor and equip them properly.
Usage:
- When viewing unit details, body-swaps into that unit.
- In the main adventure mode screen, reverts transient swap.
advtools
A package of different adventure mode tools (currently just one)
Usage:
- list-equipped [all]
- List armor and weapons equipped by your companions. If all is specified, also lists non-metal clothing.
- metal-detector [all-types] [non-trader]
- Reveal metal armor and weapons in shops. The options disable the checks on item type and being in shop.
Map modification
3dveins
Removes all existing veins from the map and generates new ones using 3D Perlin noise, in order to produce a layout that smoothly flows between Z levels. The vein distribution is based on the world seed, so running the command for the second time should produce no change. It is best to run it just once immediately after embark.
This command is intended as only a cosmetic change, so it takes care to exactly preserve the mineral counts reported by prospect all. The amounts of different layer stones may slightly change in some cases if vein mass shifts between Z layers.
This command is very unlikely to work on maps generated before version 0.34.08.
Note that there is no undo option other than restoring from backup.
changelayer
Changes material of the geology layer under cursor to the specified inorganic RAW material. Can have impact on all surrounding regions, not only your embark! By default changing stone to soil and vice versa is not allowed. By default changes only the layer at the cursor position. Note that one layer can stretch across lots of z levels. By default changes only the geology which is linked to the biome under the cursor. That geology might be linked to other biomes as well, though. Mineral veins and gem clusters will stay on the map. Use 'changevein' for them.
tl;dr: You will end up with changing quite big areas in one go, especially if you use it in lower z levels. Use with care.
Options:
| all_biomes: | Change selected layer for all biomes on your map. Result may be undesirable since the same layer can AND WILL be on different z-levels for different biomes. Use the tool 'probe' to get an idea how layers and biomes are distributed on your map. |
|---|---|
| all_layers: | Change all layers on your map (only for the selected biome unless 'all_biomes' is added). Candy mountain, anyone? Will make your map quite boring, but tidy. |
| force: | Allow changing stone to soil and vice versa. !!THIS CAN HAVE WEIRD EFFECTS, USE WITH CARE!! Note that soil will not be magically replaced with stone. You will, however, get a stone floor after digging so it will allow the floor to be engraved. Note that stone will not be magically replaced with soil. You will, however, get a soil floor after digging so it could be helpful for creating farm plots on maps with no soil. |
| verbose: | Give some details about what is being changed. |
| trouble: | Give some advice about known problems. |
Examples:
- changelayer GRANITE
- Convert layer at cursor position into granite.
- changelayer SILTY_CLAY force
- Convert layer at cursor position into clay even if it's stone.
- changelayer MARBLE all_biomes all_layers
- Convert all layers of all biomes which are not soil into marble.
Note
- If you use changelayer and nothing happens, try to pause/unpause the game for a while and try to move the cursor to another tile. Then try again. If that doesn't help try temporarily changing some other layer, undo your changes and try again for the layer you want to change. Saving and reloading your map might also help.
- You should be fine if you only change single layers without the use of 'force'. Still it's advisable to save your game before messing with the map.
- When you force changelayer to convert soil to stone you might experience weird stuff (flashing tiles, tiles changed all over place etc). Try reverting the changes manually or even better use an older savegame. You did save your game, right?
changevein
Changes material of the vein under cursor to the specified inorganic RAW material. Only affects tiles within the current 16x16 block - for veins and large clusters, you will need to use this command multiple times.
Example:
- changevein NATIVE_PLATINUM
- Convert vein at cursor position into platinum ore.
changeitem
Allows changing item material and base quality. By default the item currently selected in the UI will be changed (you can select items in the 'k' list or inside containers/inventory). By default change is only allowed if materials is of the same subtype (for example wood<->wood, stone<->stone etc). But since some transformations work pretty well and may be desired you can override this with 'force'. Note that some attributes will not be touched, possibly resulting in weirdness. To get an idea how the RAW id should look like, check some items with 'info'. Using 'force' might create items which are not touched by crafters/haulers.
Options:
| info: | Don't change anything, print some info instead. |
|---|---|
| here: | Change all items at the cursor position. Requires in-game cursor. |
| material, m: | Change material. Must be followed by valid material RAW id. |
| quality, q: | Change base quality. Must be followed by number (0-5). |
| force: | Ignore subtypes, force change to new material. |
Examples:
- changeitem m INORGANIC:GRANITE here
- Change material of all items under the cursor to granite.
- changeitem q 5
- Change currently selected item to masterpiece quality.
colonies
Allows listing all the vermin colonies on the map and optionally turning them into honey bee colonies.
Options:
| bees: | turn colonies into honey bee colonies |
|---|
createitem
Allows creating new items of arbitrary types and made of arbitrary materials. By default, items created are spawned at the feet of the selected unit.
Specify the item and material information as you would indicate them in custom reaction raws, with the following differences:
- Separate the item and material with a space rather than a colon
- If the item has no subtype, omit the :NONE
- If the item is REMAINS, FISH, FISH_RAW, VERMIN, PET, or EGG, specify a CREATURE:CASTE pair instead of a material token.
Corpses, body parts, and prepared meals cannot be created using this tool.
Examples:
- createitem GLOVES:ITEM_GLOVES_GAUNTLETS INORGANIC:STEEL 2
- Create 2 pairs of steel gauntlets.
- createitem WOOD PLANT_MAT:TOWER_CAP:WOOD
- Create tower-cap logs.
- createitem FISH FISH_SHAD:MALE 5
- Create a stack of 5 cleaned shad, ready to eat.
To change where new items are placed, first run the command with a destination type while an appropriate destination is selected.
Options:
| floor: | Subsequent items will be placed on the floor beneath the selected unit's feet. |
|---|---|
| item: | Subsequent items will be stored inside the currently selected item. |
| building: | Subsequent items will become part of the currently selected building. Best used for loading traps; do not use with workshops, or you will need to deconstruct the building to use the item. |
deramp (by zilpin)
Removes all ramps designated for removal from the map. This is useful for replicating the old channel digging designation. It also removes any and all 'down ramps' that can remain after a cave-in (you don't have to designate anything for that to happen).
feature
Enables management of map features.
- Discovering a magma feature (magma pool, volcano, magma sea, or curious underground structure) permits magma workshops and furnaces to be built.
- Discovering a cavern layer causes plants (trees, shrubs, and grass) from that cavern to grow within your fortress.
Options:
| list: | Lists all map features in your current embark by index. |
|---|---|
| show X: | Marks the selected map feature as discovered. |
| hide X: | Marks the selected map feature as undiscovered. |
infiniteSky
Automatically allocates new z-levels of sky at the top of the map as you build up, or on request allocates many levels all at once.
Examples:
- infiniteSky n
- Raise the sky by n z-levels.
- infiniteSky enable/disable
- Enables/disables monitoring of constructions. If you build anything in the second to highest z-level, it will allocate one more sky level. This is so you can continue to build stairs upward.
Bugs have been reported with this version of the plugin, so be careful. It is possible that new z-levels will suddenly disappear and possibly cause cave-ins. Saving and loading after creating new z-levels should fix the problem.
liquids
Allows adding magma, water and obsidian to the game. It replaces the normal dfhack command line and can't be used from a hotkey. Settings will be remembered as long as dfhack runs. Intended for use in combination with the command liquids-here (which can be bound to a hotkey).
For more information, refer to the command's internal help.
Note
Spawning and deleting liquids can F up pathing data and temperatures (creating heat traps). You've been warned.
liquids-here
Run the liquid spawner with the current/last settings made in liquids (if no settings in liquids were made it paints a point of 7/7 magma by default).
Intended to be used as keybinding. Requires an active in-game cursor.
tiletypes
Can be used for painting map tiles and is an interactive command, much like liquids.
The tool works with two set of options and a brush. The brush determines which tiles will be processed. First set of options is the filter, which can exclude some of the tiles from the brush by looking at the tile properties. The second set of options is the paint - this determines how the selected tiles are changed.
Both paint and filter can have many different properties including things like general shape (WALL, FLOOR, etc.), general material (SOIL, STONE, MINERAL, etc.), state of 'designated', 'hidden' and 'light' flags.
The properties of filter and paint can be partially defined. This means that you can for example do something like this:
filter material STONE
filter shape FORTIFICATION
paint shape FLOOR
This will turn all stone fortifications into floors, preserving the material.
Or this:
filter shape FLOOR
filter material MINERAL
paint shape WALL
Turning mineral vein floors back into walls.
The tool also allows tweaking some tile flags:
Or this:
paint hidden 1
paint hidden 0
This will hide previously revealed tiles (or show hidden with the 0 option).
More recently, the tool supports changing the base material of the tile to an arbitrary stone from the raws, by creating new veins as required. Note that this mode paints under ice and constructions, instead of overwriting them. To enable, use:
paint stone MICROCLINE
This mode is incompatible with the regular material setting, so changing it cancels the specific stone selection:
paint material ANY
Since different vein types have different drop rates, it is possible to choose which one to use in painting:
paint veintype CLUSTER_SMALL
When the chosen type is CLUSTER (the default), the tool may automatically choose to use layer stone or lava stone instead of veins if its material matches the desired one.
Any paint or filter option (or the entire paint or filter) can be disabled entirely by using the ANY keyword:
paint hidden ANY
paint shape ANY
filter material any
filter shape any
filter any
You can use several different brushes for painting tiles:
- Point. (point)
- Rectangular range. (range)
- A column ranging from current cursor to the first solid tile above. (column)
- DF map block - 16x16 tiles, in a regular grid. (block)
Example:
range 10 10 1
This will change the brush to a rectangle spanning 10x10 tiles on one z-level. The range starts at the position of the cursor and goes to the east, south and up.
For more details, see the 'help' command while using this.
tiletypes-commands
Runs tiletypes commands, separated by ;. This makes it possible to change tiletypes modes from a hotkey.
tiletypes-here
Apply the current tiletypes options at the in-game cursor position, including the brush. Can be used from a hotkey.
tiletypes-here-point
Apply the current tiletypes options at the in-game cursor position to a single tile. Can be used from a hotkey.
tubefill
Fills all the adamantine veins again. Veins that were hollow will be left alone.
Options:
| hollow: | fill in naturally hollow veins too |
|---|
Beware that filling in hollow veins will trigger a demon invasion on top of your miner when you dig into the region that used to be hollow.
plant
A tool for creating shrubs, growing, or getting rid of them.
Subcommands:
| create: | Create a new shrub/sapling. |
|---|---|
| grow: | Make saplings grow into trees. |
| extirpate: | Kills trees and shrubs, turning them into ashes instantly. |
| immolate: | Similar to extirpate, but sets the plants on fire instead. The fires can and will spread ;) |
create creates a new sapling under the cursor. Takes a raw ID as argument (e.g. TOWER_CAP). The cursor must be located on a dirt or grass floor tile.
grow works on the sapling under the cursor, and turns it into a tree. Works on all shrubs of the map if the cursor is hidden.
extirpate and immolate work only on the plant under the cursor.
For mass effects, use one of the additional options:
| shrubs: | affect all shrubs on the map |
|---|---|
| trees: | affect all trees on the map |
| all: | affect every plant! |
regrass
Regrows grass. Not much to it ;)
weather
Prints the current weather map by default.
Also lets you change the current weather to 'clear sky', 'rainy' or 'snowing'.
Options:
| snow: | make it snow everywhere. |
|---|---|
| rain: | make it rain. |
| clear: | clear the sky. |
Map inspection
cursecheck
Checks a single map tile or the whole map/world for cursed creatures (ghosts, vampires, necromancers, werebeasts, zombies).
With an active in-game cursor only the selected tile will be observed. Without a cursor the whole map will be checked.
By default cursed creatures will be only counted in case you just want to find out if you have any of them running around in your fort. Dead and passive creatures (ghosts who were put to rest, killed vampires, ...) are ignored. Undead skeletons, corpses, bodyparts and the like are all thrown into the curse category "zombie". Anonymous zombies and resurrected body parts will show as "unnamed creature".
Options:
| detail: | Print full name, date of birth, date of curse and some status info (some vampires might use fake identities in-game, though). |
|---|---|
| nick: | Set the type of curse as nickname (does not always show up in-game, some vamps don't like nicknames). |
| all: | Include dead and passive cursed creatures (can result in a quite long list after having FUN with necromancers). |
| verbose: | Print all curse tags (if you really want to know it all). |
Examples:
- cursecheck detail all
- Give detailed info about all cursed creatures including deceased ones (no in-game cursor).
- cursecheck nick
- Give a nickname all living/active cursed creatures on the map(no in-game cursor).
Note
- If you do a full search (with the option "all") former ghosts will show up with the cursetype "unknown" because their ghostly flag is not set anymore. But if you happen to find a living/active creature with cursetype "unknown" please report that in the dfhack thread on the modding forum or per irc. This is likely to happen with mods which introduce new types of curses, for example.
flows
A tool for checking how many tiles contain flowing liquids. If you suspect that your magma sea leaks into HFS, you can use this tool to be sure without revealing the map.
probe
Can be used to determine tile properties like temperature.
prospect
Prints a big list of all the present minerals and plants. By default, only the visible part of the map is scanned.
Options:
| all: | Scan the whole map, as if it was revealed. |
|---|---|
| value: | Show material value in the output. Most useful for gems. |
| hell: | Show the Z range of HFS tubes. Implies 'all'. |
Pre-embark estimate
If prospect is called during the embark selection screen, it displays an estimate of layer stone availability.
Note
The results of pre-embark prospect are an estimate, and can at best be expected to be somewhere within +/- 30% of the true amount; sometimes it does a lot worse. Especially, it is not clear how to precisely compute how many soil layers there will be in a given embark tile, so it can report a whole extra layer, or omit one that is actually present.
Options:
| all: | Also estimate vein mineral amounts. |
|---|
reveal
This reveals the map. By default, HFS will remain hidden so that the demons don't spawn. You can use 'reveal hell' to reveal everything. With hell revealed, you won't be able to unpause until you hide the map again. If you really want to unpause with hell revealed, use 'reveal demons'.
Reveal also works in adventure mode, but any of its effects are negated once you move. When you use it this way, you don't need to run 'unreveal'.
unreveal
Reverts the effects of 'reveal'.
revtoggle
Switches between 'reveal' and 'unreveal'.
revflood
This command will hide the whole map and then reveal all the tiles that have a path to the in-game cursor.
revforget
When you use reveal, it saves information about what was/wasn't visible before revealing everything. Unreveal uses this information to hide things again. This command throws away the information. For example, use in cases where you abandoned with the fort revealed and no longer want the data.
showmood
Shows all items needed for the currently active strange mood.
Designations
burrow
Miscellaneous burrow control. Allows manipulating burrows and automated burrow expansion while digging.
Options:
- enable feature ...
- Enable features of the plugin.
- disable feature ...
- Disable features of the plugin.
- clear-unit burrow burrow ...
- Remove all units from the burrows.
- clear-tiles burrow burrow ...
- Remove all tiles from the burrows.
- set-units target-burrow src-burrow ...
- Clear target, and adds units from source burrows.
- add-units target-burrow src-burrow ...
- Add units from the source burrows to the target.
- remove-units target-burrow src-burrow ...
- Remove units in source burrows from the target.
- set-tiles target-burrow src-burrow ...
- Clear target and adds tiles from the source burrows.
- add-tiles target-burrow src-burrow ...
- Add tiles from the source burrows to the target.
- remove-tiles target-burrow src-burrow ...
Remove tiles in source burrows from the target.
For these three options, in place of a source burrow it is possible to use one of the following keywords: ABOVE_GROUND, SUBTERRANEAN, INSIDE, OUTSIDE, LIGHT, DARK, HIDDEN, REVEALED
Features:
| auto-grow: | When a wall inside a burrow with a name ending in '+' is dug out, the burrow is extended to newly-revealed adjacent walls. This final '+' may be omitted in burrow name args of commands above. Digging 1-wide corridors with the miner inside the burrow is SLOW. |
|---|
digv
Designates a whole vein for digging. Requires an active in-game cursor placed over a vein tile. With the 'x' option, it will traverse z-levels (putting stairs between the same-material tiles).
digvx
A permanent alias for 'digv x'.
digl
Designates layer stone for digging. Requires an active in-game cursor placed over a layer stone tile. With the 'x' option, it will traverse z-levels (putting stairs between the same-material tiles). With the 'undo' option it will remove the dig designation instead (if you realize that digging out a 50 z-level deep layer was not such a good idea after all).
diglx
A permanent alias for 'digl x'.
digexp
This command can be used for exploratory mining.
See: http://df.magmawiki.com/index.php/DF2010:Exploratory_mining
There are two variables that can be set: pattern and filter.
Patterns:
| diag5: | diagonals separated by 5 tiles |
|---|---|
| diag5r: | diag5 rotated 90 degrees |
| ladder: | A 'ladder' pattern |
| ladderr: | ladder rotated 90 degrees |
| clear: | Just remove all dig designations |
| cross: | A cross, exactly in the middle of the map. |
Filters:
| all: | designate whole z-level |
|---|---|
| hidden: | designate only hidden tiles of z-level (default) |
| designated: | Take current designation and apply pattern to it. |
After you have a pattern set, you can use 'expdig' to apply it again.
Examples:
- expdig diag5 hidden
- Designate the diagonal 5 patter over all hidden tiles
- expdig
- Apply last used pattern and filter
- expdig ladder designated
- Take current designations and replace them with the ladder pattern
digcircle
A command for easy designation of filled and hollow circles. It has several types of options.
Shape:
| hollow: | Set the circle to hollow (default) |
|---|---|
| filled: | Set the circle to filled |
| #: | Diameter in tiles (default = 0, does nothing) |
Action:
| set: | Set designation (default) |
|---|---|
| unset: | Unset current designation |
| invert: | Invert designations already present |
Designation types:
| dig: | Normal digging designation (default) |
|---|---|
| ramp: | Ramp digging |
| ustair: | Staircase up |
| dstair: | Staircase down |
| xstair: | Staircase up/down |
| chan: | Dig channel |
After you have set the options, the command called with no options repeats with the last selected parameters.
Examples:
- 'digcircle filled 3' = Dig a filled circle with radius = 3.
- 'digcircle' = Do it again.
digtype
For every tile on the map of the same vein type as the selected tile, this command designates it to have the same designation as the selected tile. If the selected tile has no designation, they will be dig designated. If an argument is given, the designation of the selected tile is ignored, and all appropriate tiles are set to the specified designation.
Options:
| dig: | |
|---|---|
| channel: | |
| ramp: | |
| updown: | up/down stairs |
| up: | up stairs |
| down: | down stairs |
| clear: | clear designation |
digFlood
Automatically digs out specified veins as they are discovered. It runs once every time a dwarf finishes a dig job. It will only dig out appropriate tiles that are adjacent to the finished dig job. To add a vein type, use digFlood 1 [type]. This will also enable the plugin. To remove a vein type, use digFlood 0 [type] 1 to disable, then remove, then re-enable.
digFlood 0 disable
digFlood 1 enable
digFlood 0 MICROCLINE COAL_BITUMINOUS 1 disable plugin, remove microcline and bituminous coal from monitoring, then re-enable the plugin
digFlood CLEAR remove all inorganics from monitoring
digFlood digAll1 ignore the monitor list and dig any vein
digFlood digAll0 disable digAll mode
See help digFlood for details.
filltraffic
Set traffic designations using flood-fill starting at the cursor.
Traffic Type Codes:
| H: | High Traffic |
|---|---|
| N: | Normal Traffic |
| L: | Low Traffic |
| R: | Restricted Traffic |
Other Options:
| X: | Fill accross z-levels. |
|---|---|
| B: | Include buildings and stockpiles. |
| P: | Include empty space. |
Example:
- filltraffic H
- When used in a room with doors, it will set traffic to HIGH in just that room.
alltraffic
Set traffic designations for every single tile of the map (useful for resetting traffic designations).
Traffic Type Codes:
| H: | High Traffic |
|---|---|
| N: | Normal Traffic |
| L: | Low Traffic |
| R: | Restricted Traffic |
Example:
- alltraffic N
- Set traffic to 'normal' for all tiles.
restrictliquid
Restrict traffic on all visible tiles with liquid.
restrictice
Restrict traffic on all tiles on top of visible ice.
getplants
This tool allows plant gathering and tree cutting by RAW ID. Specify the types of trees to cut down and/or shrubs to gather by their plant names, separated by spaces.
Options:
| -t: | Select trees only (exclude shrubs) |
|---|---|
| -s: | Select shrubs only (exclude trees) |
| -c: | Clear designations instead of setting them |
| -x: | Apply selected action to all plants except those specified (invert selection) |
Specifying both -t and -s will have no effect. If no plant IDs are specified, all valid plant IDs will be listed.
Cleanup and garbage disposal
clean
Cleans all the splatter that get scattered all over the map, items and creatures. In an old fortress, this can significantly reduce FPS lag. It can also spoil your !!FUN!!, so think before you use it.
Options:
| map: | Clean the map tiles. By default, it leaves mud and snow alone. |
|---|---|
| units: | Clean the creatures. Will also clean hostiles. |
| items: | Clean all the items. Even a poisoned blade. |
Extra options for 'map':
| mud: | Remove mud in addition to the normal stuff. |
|---|---|
| snow: | Also remove snow coverings. |
spotclean
Works like 'clean map snow mud', but only for the tile under the cursor. Ideal if you want to keep that bloody entrance 'clean map' would clean up.
autodump
This utility lets you quickly move all items designated to be dumped. Items are instantly moved to the cursor position, the dump flag is unset, and the forbid flag is set, as if it had been dumped normally. Be aware that any active dump item tasks still point at the item.
Cursor must be placed on a floor tile so the items can be dumped there.
Options:
| destroy: | Destroy instead of dumping. Doesn't require a cursor. |
|---|---|
| destroy-here: | Destroy items only under the cursor. |
| visible: | Only process items that are not hidden. |
| hidden: | Only process hidden items. |
| forbidden: | Only process forbidden items (default: only unforbidden). |
autodump-destroy-here
Destroy items marked for dumping under cursor. Identical to autodump destroy-here, but intended for use as keybinding.
autodump-destroy-item
Destroy the selected item. The item may be selected in the 'k' list, or inside a container. If called again before the game is resumed, cancels destroy.
cleanowned
Confiscates items owned by dwarfs. By default, owned food on the floor and rotten items are confistacted and dumped.
Options:
| all: | confiscate all owned items |
|---|---|
| scattered: | confiscated and dump all items scattered on the floor |
| x: | confiscate/dump items with wear level 'x' and more |
| X: | confiscate/dump items with wear level 'X' and more |
| dryrun: | a dry run. combine with other options to see what will happen without it actually happening. |
Example:
- cleanowned scattered X
- This will confiscate rotten and dropped food, garbage on the floors and any worn items with 'X' damage and above.
Bugfixes
drybuckets
This utility removes water from all buckets in your fortress, allowing them to be safely used for making lye.
fixdiplomats
Up to version 0.31.12, Elves only sent Diplomats to your fortress to propose tree cutting quotas due to a bug; once that bug was fixed, Elves stopped caring about excess tree cutting. This command adds a Diplomat position to all Elven civilizations, allowing them to negotiate tree cutting quotas (and allowing you to violate them and potentially start wars) in case you haven't already modified your raws accordingly.
fixmerchants
This command adds the Guild Representative position to all Human civilizations, allowing them to make trade agreements (just as they did back in 0.28.181.40d and earlier) in case you haven't already modified your raws accordingly.
fixveins
Removes invalid references to mineral inclusions and restores missing ones. Use this if you broke your embark with tools like tiletypes, or if you accidentally placed a construction on top of a valuable mineral floor.
tweak
Contains various tweaks for minor bugs.
One-shot subcommands:
| clear-missing: | Remove the missing status from the selected unit. This allows engraving slabs for ghostly, but not yet found, creatures. |
|---|---|
| clear-ghostly: | Remove the ghostly status from the selected unit and mark it as dead. This allows getting rid of bugged ghosts which do not show up in the engraving slab menu at all, even after using clear-missing. It works, but is potentially very dangerous - so use with care. Probably (almost certainly) it does not have the same effects like a proper burial. You've been warned. |
| fixmigrant: | Remove the resident/merchant flag from the selected unit. Intended to fix bugged migrants/traders who stay at the map edge and don't enter your fort. Only works for dwarves (or generally the player's race in modded games). Do NOT abuse this for 'real' caravan merchants (if you really want to kidnap them, use 'tweak makeown' instead, otherwise they will have their clothes set to forbidden etc). |
| makeown: | Force selected unit to become a member of your fort. Can be abused to grab caravan merchants and escorts, even if they don't belong to the player's race. Foreign sentients (humans, elves) can be put to work, but you can't assign rooms to them and they don't show up in DwarfTherapist because the game treats them like pets. Grabbing draft animals from a caravan can result in weirdness (animals go insane or berserk and are not flagged as tame), but you are allowed to mark them for slaughter. Grabbing wagons results in some funny spam, then they are scuttled. |
Subcommands that persist until disabled or DF quit:
| stable-cursor: | Saves the exact cursor position between t/q/k/d/etc menus of dwarfmode. |
|---|---|
| fast-heat: | Further improves temperature update performance by ensuring that 1 degree of item temperature is crossed in no more than specified number of frames when updating from the environment temperature. This reduces the time it takes for stable-temp to stop updates again when equilibrium is disturbed. |
| advmode-contained: | |
Works around bug 6202, i.e. custom reactions with container inputs in advmode. The issue is that the screen tries to force you to select the contents separately from the container. This forcefully skips child reagents. |
|
| fast-trade: | Makes Shift-Down in the Move Goods to Depot and Trade screens select the current item (fully, in case of a stack), and scroll down one line. |
| military-stable-assign: | |
Preserve list order and cursor position when assigning to squad, i.e. stop the rightmost list of the Positions page of the military screen from constantly resetting to the top. |
|
| military-color-assigned: | |
Color squad candidates already assigned to other squads in yellow/green to make them stand out more in the list. 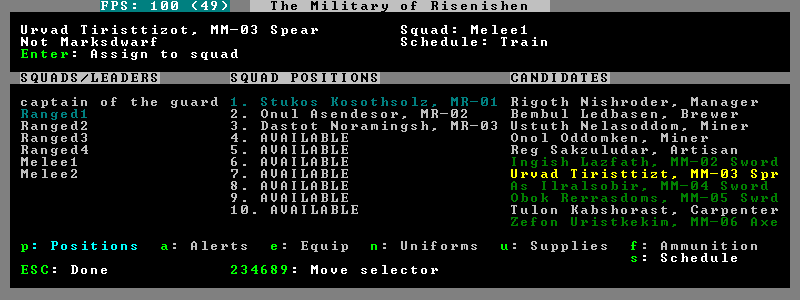
|
|
| craft-age-wear: | Fixes the behavior of crafted items wearing out over time (bug 6003). With this tweak, items made from cloth and leather will gain a level of wear every 20 years. |
| adamantine-cloth-wear: | |
Prevents adamantine clothing from wearing out while being worn (bug 6481). |
|
| farm-plot-select: | |
Adds "Select all" and "Deselect all" options to farm plot menus |
|
| import-priority-category: | |
Allows changing the priority of all goods in a category when discussing an import agreement with the liaison |
|
| manager-quantity: | |
Removes the limit of 30 jobs per manager order |
|
| civ-view-agreement: | |
Fixes overlapping text on the "view agreement" screen |
|
| nestbox-color: | Fixes the color of built nestboxes |
| eggs-fertile: | Displays a fertility indicator on nestboxes |
fix-armory
Enables a fix for storage of squad equipment in barracks.
Specifically, it prevents your haulers from moving squad equipment to stockpiles, and instead queues jobs to store it on weapon racks, armor stands, and in containers.
Note
In order to actually be used, weapon racks have to be patched and manually assigned to a squad. See documentation for gui/assign-rack below.
Also, the default capacity of armor stands is way too low, so you may want to also apply the armorstand-capacity patch. Check out http://www.bay12games.com/dwarves/mantisbt/view.php?id=1445 for more information about the bugs.
Note that the buildings in the armory are used as follows:
- Weapon racks (when patched) are used to store any assigned weapons. Each rack belongs to a specific squad, and can store up to 5 weapons.
- Armor stands belong to specific squad members and are used for armor and shields. By default one stand can store one item of each type (hence one boot or gauntlet); if patched, the limit is raised to 2, which should be sufficient.
- Cabinets are used to store assigned clothing for a specific squad member. They are never used to store owned clothing.
- Chests (boxes, etc) are used for a flask, backpack or quiver assigned to the squad member. Due to a probable bug, food is dropped out of the backpack when it is stored.
Warning
Although armor stands, cabinets and chests properly belong only to one squad member, the owner of the building used to create the barracks will randomly use any containers inside the room. Thus, it is recommended to always create the armory from a weapon rack.
Contrary to the common misconception, all these uses are controlled by the Individual Equipment usage flag. The Squad Equipment flag is actually intended for ammo, but the game does even less in that area than for armor and weapons. This plugin implements the following rules almost from scratch:
- Combat ammo is stored in chests inside rooms with Squad Equipment enabled.
- If a chest is assigned to a squad member due to Individual Equipment also being set, it is only used for that squad's ammo; otherwise, any squads with Squad Equipment on the room will use all of the chests at random.
- Training ammo is stored in chests inside archery ranges designated from archery targets, and controlled by the same Train flag as archery training itself. This is inspired by some defunct code for weapon racks.
There are some minor traces in the game code to suggest that the first of these rules is intended by Toady; the rest are invented by this plugin.
Mode switch and reclaim
lair
This command allows you to mark the map as 'monster lair', preventing item scatter on abandon. When invoked as 'lair reset', it does the opposite.
Unlike reveal, this command doesn't save the information about tiles - you won't be able to restore state of real monster lairs using 'lair reset'.
Options:
| lair: | Mark the map as monster lair |
|---|---|
| lair reset: | Mark the map as ordinary (not lair) |
mode
This command lets you see and change the game mode directly. Not all combinations are good for every situation and most of them will produce undesirable results. There are a few good ones though.
Example
You are in fort game mode, managing your fortress and paused. You switch to the arena game mode, assume control of a creature and then switch to adventure game mode(1). You just lost a fortress and gained an adventurer. You could also do this. You are in fort game mode, managing your fortress and paused at the esc menu. You switch to the adventure game mode, then use Dfusion to assume control of a creature and then save or retire. You just created a returnable mountain home and gained an adventurer.
I take no responsibility of anything that happens as a result of using this tool
Visualizer and data export
ssense / stonesense
An isometric visualizer that runs in a second window. This requires working graphics acceleration and at least a dual core CPU (otherwise it will slow down DF).
All the data resides in the 'stonesense' directory. For detailed instructions, see stonesense/README.txt
Compatible with Windows > XP SP3 and most modern Linux distributions.
Older versions, support and extra graphics can be found in the bay12 forum thread: http://www.bay12forums.com/smf/index.php?topic=43260.0
Some additional resources: http://df.magmawiki.com/index.php/Utility:Stonesense/Content_repository
mapexport
Export the current loaded map as a file. This will be eventually usable with visualizers.
dwarfexport
Export dwarves to RuneSmith-compatible XML.
exportlegends
Controls legends mode to export data - especially useful to set-and-forget large worlds, or when you want a map of every site when there are several hundred.
Options:
| info: | Exports the world/gen info and the legends XML |
|---|---|
| sites: | Exports all available site maps |
| maps: | Exports all seventeen detailed maps |
| all: | Equivalent to calling all of the above, in that order |
Job management
job
Command for general job query and manipulation.
Options:
- no extra options
- Print details of the current job. The job can be selected in a workshop, or the unit/jobs screen.
- list
- Print details of all jobs in the selected workshop.
- item-material <item-idx> <material[:subtoken]>
- Replace the exact material id in the job item.
- item-type <item-idx> <type[:subtype]>
- Replace the exact item type id in the job item.
job-material
Alter the material of the selected job.
Invoked as:
job-material <inorganic-token>
Intended to be used as a keybinding:
- In 'q' mode, when a job is highlighted within a workshop or furnace, changes the material of the job. Only inorganic materials can be used in this mode.
- In 'b' mode, during selection of building components positions the cursor over the first available choice with the matching material.
job-duplicate
Duplicate the selected job in a workshop:
- In 'q' mode, when a job is highlighted within a workshop or furnace building, instantly duplicates the job.
stockflow
Allows the fortress bookkeeper to queue jobs through the manager, based on space or items available in stockpiles.
Usage:
- stockflow enable
- Enable the plugin.
- stockflow disable
- Disable the plugin.
- stockflow fast
- Enable the plugin in fast mode.
- stockflow list
- List any work order settings for your stockpiles.
- stockflow status
- Display whether the plugin is enabled.
While enabled, the 'q' menu of each stockpile will have two new options:
- j: Select a job to order, from an interface like the manager's screen.
- J: Cycle between several options for how many such jobs to order.
Whenever the bookkeeper updates stockpile records, new work orders will be placed on the manager's queue for each such selection, reduced by the number of identical orders already in the queue.
In fast mode, new work orders will be enqueued once per day, instead of waiting for the bookkeeper.
workflow
Manage control of repeat jobs.
Usage:
- workflow enable [option...], workflow disable [option...]
If no options are specified, enables or disables the plugin. Otherwise, enables or disables any of the following options:
- drybuckets: Automatically empty abandoned water buckets.
- auto-melt: Resume melt jobs when there are objects to melt.
- workflow jobs
- List workflow-controlled jobs (if in a workshop, filtered by it).
- workflow list
- List active constraints, and their job counts.
- workflow list-commands
- List active constraints as workflow commands that re-create them; this list can be copied to a file, and then reloaded using the script built-in command.
- workflow count <constraint-spec> <cnt-limit> [cnt-gap]
- Set a constraint, counting every stack as 1 item.
- workflow amount <constraint-spec> <cnt-limit> [cnt-gap]
- Set a constraint, counting all items within stacks.
- workflow unlimit <constraint-spec>
- Delete a constraint.
- workflow unlimit-all
- Delete all constraints.
Function
When the plugin is enabled, it protects all repeat jobs from removal. If they do disappear due to any cause, they are immediately re-added to their workshop and suspended.
In addition, when any constraints on item amounts are set, repeat jobs that produce that kind of item are automatically suspended and resumed as the item amount goes above or below the limit. The gap specifies how much below the limit the amount has to drop before jobs are resumed; this is intended to reduce the frequency of jobs being toggled.
Check out the gui/workflow script below for a simple front-end integrated in the game UI.
Constraint format
The contstraint spec consists of 4 parts, separated with '/' characters:
ITEM[:SUBTYPE]/[GENERIC_MAT,...]/[SPECIFIC_MAT:...]/[LOCAL,<quality>]
The first part is mandatory and specifies the item type and subtype, using the raw tokens for items, in the same syntax you would e.g. use for a custom reaction input. See this list for more info: http://dwarffortresswiki.org/index.php/Item_token
The subsequent parts are optional:
A generic material spec constrains the item material to one of the hard-coded generic classes, which currently include:
PLANT WOOD CLOTH SILK LEATHER BONE SHELL SOAP TOOTH HORN PEARL YARN
METAL STONE SAND GLASS CLAY MILK
A specific material spec chooses the material exactly, using the raw syntax for reaction input materials, e.g. INORGANIC:IRON, although for convenience it also allows just IRON, or ACACIA:WOOD etc. See this page for more details on the unabbreviated raw syntax:
A comma-separated list of miscellaneous flags, which currently can be used to ignore imported items or items below a certain quality.
Constraint examples
Keep metal bolts within 900-1000, and wood/bone within 150-200:
workflow amount AMMO:ITEM_AMMO_BOLTS/METAL 1000 100
workflow amount AMMO:ITEM_AMMO_BOLTS/WOOD,BONE 200 50
Keep the number of prepared food & drink stacks between 90 and 120:
workflow count FOOD 120 30
workflow count DRINK 120 30
Make sure there are always 25-30 empty bins/barrels/bags:
workflow count BIN 30
workflow count BARREL 30
workflow count BOX/CLOTH,SILK,YARN 30
Make sure there are always 15-20 coal and 25-30 copper bars:
workflow count BAR//COAL 20
workflow count BAR//COPPER 30
Produce 15-20 gold crafts:
workflow count CRAFTS//GOLD 20
Collect 15-20 sand bags and clay boulders:
workflow count POWDER_MISC/SAND 20
workflow count BOULDER/CLAY 20
Make sure there are always 80-100 units of dimple dye:
workflow amount POWDER_MISC//MUSHROOM_CUP_DIMPLE:MILL 100 20
Note
In order for this to work, you have to set the material of the PLANT input on the Mill Plants job to MUSHROOM_CUP_DIMPLE using the 'job item-material' command. Otherwise the plugin won't be able to deduce the output material.
Maintain 10-100 locally-made crafts of exceptional quality:
workflow count CRAFTS///LOCAL,EXCEPTIONAL 100 90
Fortress activity management
seedwatch
Watches the numbers of seeds available and enables/disables seed and plant cooking.
Each plant type can be assigned a limit. If their number falls below that limit, the plants and seeds of that type will be excluded from cookery. If the number rises above the limit + 20, then cooking will be allowed.
The plugin needs a fortress to be loaded and will deactivate automatically otherwise. You have to reactivate with 'seedwatch start' after you load the game.
Options:
| all: | Adds all plants from the abbreviation list to the watch list. |
|---|---|
| start: | Start watching. |
| stop: | Stop watching. |
| info: | Display whether seedwatch is watching, and the watch list. |
| clear: | Clears the watch list. |
Examples:
- seedwatch MUSHROOM_HELMET_PLUMP 30
- add MUSHROOM_HELMET_PLUMP to the watch list, limit = 30
- seedwatch MUSHROOM_HELMET_PLUMP
- removes MUSHROOM_HELMET_PLUMP from the watch list.
- seedwatch all 30
- adds all plants from the abbreviation list to the watch list, the limit being 30.
zone
Helps a bit with managing activity zones (pens, pastures and pits) and cages.
Options:
| set: | Set zone or cage under cursor as default for future assigns. |
|---|---|
| assign: | Assign unit(s) to the pen or pit marked with the 'set' command. If no filters are set a unit must be selected in the in-game ui. Can also be followed by a valid zone id which will be set instead. |
| unassign: | Unassign selected creature from it's zone. |
| nick: | Mass-assign nicknames, must be followed by the name you want to set. |
| remnick: | Mass-remove nicknames. |
| tocages: | Assign unit(s) to cages inside a pasture. |
| uinfo: | Print info about unit(s). If no filters are set a unit must be selected in the in-game ui. |
| zinfo: | Print info about zone(s). If no filters are set zones under the cursor are listed. |
| verbose: | Print some more info. |
| filters: | Print list of valid filter options. |
| examples: | Print some usage examples. |
| not: | Negates the next filter keyword. |
Filters:
| all: | Process all units (to be used with additional filters). |
|---|---|
| count: | Must be followed by a number. Process only n units (to be used with additional filters). |
| unassigned: | Not assigned to zone, chain or built cage. |
| minage: | Minimum age. Must be followed by number. |
| maxage: | Maximum age. Must be followed by number. |
| race: | Must be followed by a race RAW ID (e.g. BIRD_TURKEY, ALPACA, etc). Negatable. |
| caged: | In a built cage. Negatable. |
| own: | From own civilization. Negatable. |
| merchant: | Is a merchant / belongs to a merchant. Should only be used for pitting, not for stealing animals (slaughter should work). |
| war: | Trained war creature. Negatable. |
| hunting: | Trained hunting creature. Negatable. |
| tamed: | Creature is tame. Negatable. |
| trained: | Creature is trained. Finds war/hunting creatures as well as creatures who have a training level greater than 'domesticated'. If you want to specifically search for war/hunting creatures use 'war' or 'hunting' Negatable. |
| trainablewar: | Creature can be trained for war (and is not already trained for war/hunt). Negatable. |
| trainablehunt: | Creature can be trained for hunting (and is not already trained for war/hunt). Negatable. |
| male: | Creature is male. Negatable. |
| female: | Creature is female. Negatable. |
| egglayer: | Race lays eggs. Negatable. |
| grazer: | Race is a grazer. Negatable. |
| milkable: | Race is milkable. Negatable. |
Usage with single units
One convenient way to use the zone tool is to bind the command 'zone assign' to a hotkey, maybe also the command 'zone set'. Place the in-game cursor over a pen/pasture or pit, use 'zone set' to mark it. Then you can select units on the map (in 'v' or 'k' mode), in the unit list or from inside cages and use 'zone assign' to assign them to their new home. Allows pitting your own dwarves, by the way.
Usage with filters
All filters can be used together with the 'assign' command.
Restrictions: It's not possible to assign units who are inside built cages or chained because in most cases that won't be desirable anyways. It's not possible to cage owned pets because in that case the owner uncages them after a while which results in infinite hauling back and forth.
Usually you should always use the filter 'own' (which implies tame) unless you want to use the zone tool for pitting hostiles. 'own' ignores own dwarves unless you specify 'race DWARF' (so it's safe to use 'assign all own' to one big pasture if you want to have all your animals at the same place). 'egglayer' and 'milkable' should be used together with 'female' unless you have a mod with egg-laying male elves who give milk or whatever. Merchants and their animals are ignored unless you specify 'merchant' (pitting them should be no problem, but stealing and pasturing their animals is not a good idea since currently they are not properly added to your own stocks; slaughtering them should work).
Most filters can be negated (e.g. 'not grazer' -> race is not a grazer).
Mass-renaming
Using the 'nick' command you can set the same nickname for multiple units. If used without 'assign', 'all' or 'count' it will rename all units in the current default target zone. Combined with 'assign', 'all' or 'count' (and further optional filters) it will rename units matching the filter conditions.
Cage zones
Using the 'tocages' command you can assign units to a set of cages, for example a room next to your butcher shop(s). They will be spread evenly among available cages to optimize hauling to and butchering from them. For this to work you need to build cages and then place one pen/pasture activity zone above them, covering all cages you want to use. Then use 'zone set' (like with 'assign') and use 'zone tocages filter1 filter2 ...'. 'tocages' overwrites 'assign' because it would make no sense, but can be used together with 'nick' or 'remnick' and all the usual filters.
Examples
- zone assign all own ALPACA minage 3 maxage 10
- Assign all own alpacas who are between 3 and 10 years old to the selected pasture.
- zone assign all own caged grazer nick ineedgrass
- Assign all own grazers who are sitting in cages on stockpiles (e.g. after buying them from merchants) to the selected pasture and give them the nickname 'ineedgrass'.
- zone assign all own not grazer not race CAT
- Assign all own animals who are not grazers, excluding cats.
- zone assign count 5 own female milkable
- Assign up to 5 own female milkable creatures to the selected pasture.
- zone assign all own race DWARF maxage 2
- Throw all useless kids into a pit :)
- zone nick donttouchme
- Nicknames all units in the current default zone or cage to 'donttouchme'. Mostly intended to be used for special pastures or cages which are not marked as rooms you want to protect from autobutcher.
- zone tocages count 50 own tame male not grazer
- Stuff up to 50 owned tame male animals who are not grazers into cages built on the current default zone.
autonestbox
Assigns unpastured female egg-layers to nestbox zones. Requires that you create pen/pasture zones above nestboxes. If the pen is bigger than 1x1 the nestbox must be in the top left corner. Only 1 unit will be assigned per pen, regardless of the size. The age of the units is currently not checked, most birds grow up quite fast. Egglayers who are also grazers will be ignored, since confining them to a 1x1 pasture is not a good idea. Only tame and domesticated own units are processed since pasturing half-trained wild egglayers could destroy your neat nestbox zones when they revert to wild. When called without options autonestbox will instantly run once.
Options:
| start: | Start running every X frames (df simulation ticks). Default: X=6000, which would be every 60 seconds at 100fps. |
|---|---|
| stop: | Stop running automatically. |
| sleep: | Must be followed by number X. Changes the timer to sleep X frames between runs. |
autobutcher
Assigns lifestock for slaughter once it reaches a specific count. Requires that you add the target race(s) to a watch list. Only tame units will be processed.
Named units will be completely ignored (to protect specific animals from autobutcher you can give them nicknames with the tool 'rename unit' for single units or with 'zone nick' to mass-rename units in pastures and cages).
Creatures trained for war or hunting will be ignored as well.
Creatures assigned to cages will be ignored if the cage is defined as a room (to avoid butchering unnamed zoo animals).
Once you have too much adults, the oldest will be butchered first. Once you have too much kids, the youngest will be butchered first. If you don't set any target count the following default will be used: 1 male kid, 5 female kids, 1 male adult, 5 female adults.
Options:
| start: | Start running every X frames (df simulation ticks). Default: X=6000, which would be every 60 seconds at 100fps. |
|---|---|
| stop: | Stop running automatically. |
| sleep: | Must be followed by number X. Changes the timer to sleep X frames between runs. |
| watch R: | Start watching a race. R can be a valid race RAW id (ALPACA, BIRD_TURKEY, etc) or a list of ids seperated by spaces or the keyword 'all' which affects all races on your current watchlist. |
| unwatch R: | Stop watching race(s). The current target settings will be remembered. R can be a list of ids or the keyword 'all'. |
| forget R: | Stop watching race(s) and forget it's/their target settings. R can be a list of ids or the keyword 'all'. |
| autowatch: | Automatically adds all new races (animals you buy from merchants, tame yourself or get from migrants) to the watch list using default target count. |
| noautowatch: | Stop auto-adding new races to the watchlist. |
| list: | Print the current status and watchlist. |
| list_export: | Print status and watchlist in a format which can be used to import them to another savegame (see notes). |
| target fk mk fa ma R: | |
| Set target count for specified race(s). fk = number of female kids, mk = number of male kids, fa = number of female adults, ma = number of female adults. R can be a list of ids or the keyword 'all' or 'new'. R = 'all': change target count for all races on watchlist and set the new default for the future. R = 'new': don't touch current settings on the watchlist, only set the new default for future entries. | |
| example: | Print some usage examples. |
Examples:
You want to keep max 7 kids (4 female, 3 male) and max 3 adults (2 female, 1 male) of the race alpaca. Once the kids grow up the oldest adults will get slaughtered. Excess kids will get slaughtered starting with the youngest to allow that the older ones grow into adults. Any unnamed cats will be slaughtered as soon as possible.
autobutcher target 4 3 2 1 ALPACA BIRD_TURKEY
autobutcher target 0 0 0 0 CAT
autobutcher watch ALPACA BIRD_TURKEY CAT
autobutcher start
Automatically put all new races onto the watchlist and mark unnamed tame units for slaughter as soon as they arrive in your fort. Settings already made for specific races will be left untouched.
autobutcher target 0 0 0 0 new
autobutcher autowatch
autobutcher start
Stop watching the races alpaca and cat, but remember the target count settings so that you can use 'unwatch' without the need to enter the values again. Note: 'autobutcher unwatch all' works, but only makes sense if you want to keep the plugin running with the 'autowatch' feature or manually add some new races with 'watch'. If you simply want to stop it completely use 'autobutcher stop' instead.
autobutcher unwatch ALPACA CAT
Note:
Settings and watchlist are stored in the savegame, so that you can have different settings for each world. If you want to copy your watchlist to another savegame you can use the command list_export:
Load savegame where you made the settings.
Start a CMD shell and navigate to the df directory. Type the following into the shell:
dfhack-run autobutcher list_export > autobutcher.bat
Load the savegame where you want to copy the settings to, run the batch file (from the shell):
autobutcher.bat
autochop
Automatically manage tree cutting designation to keep available logs withing given quotas.
Open the dashboard by running:
getplants autochop
The plugin must be activated (with 'a') before it can be used. You can then set logging quotas and restrict designations to specific burrows (with 'Enter') if desired. The plugin's activity cycle runs once every in game day.
If you add
enable getplants
to your dfhack.init there will be a hotkey to open the dashboard from the chop designation menu.
autolabor
Automatically manage dwarf labors to efficiently complete jobs. Autolabor tries to keep as many dwarves as possible busy but also tries to have dwarves specialize in specific skills.
The key is that, for almost all labors, once a dwarf begins a job it will finish that job even if the associated labor is removed. Autolabor therefore frequently checks which dwarf or dwarves should take new jobs for that labor, and sets labors accordingly. Labors with equiptment (mining, hunting, and woodcutting), which are abandoned if labors change mid-job, are handled slightly differently to minimise churn.
Warning: autolabor will override any manual changes you make to labors while it is enabled, including through other tools such as Dwarf Therapist
Simple usage:
| enable autolabor: | |
|---|---|
| Enables the plugin with default settings. (Persistent per fortress) | |
| disable autolabor: | |
| Disables the plugin. | |
Anything beyond this is optional - autolabor works well on the default settings.
Advanced usage:
| autolabor <labor> <minimum> [<maximum>]: | |
|---|---|
| Set number of dwarves assigned to a labor. | |
| autolabor <labor> haulers: | |
| Set a labor to be handled by hauler dwarves. | |
| autolabor <labor> disable: | |
| Turn off autolabor for a specific labor. | |
| autolabor <labor> reset: | |
| Return a labor to the default handling. | |
| autolabor reset-all: | |
| Return all labors to the default handling. | |
| autolabor list: | List current status of all labors. |
| autolabor status: | |
| Show basic status information. | |
Examples:
| autolabor MINE 5: | |
|---|---|
| Keep at least 5 dwarves with mining enabled. | |
| autolabor CUT_GEM 1 1: | |
| Keep exactly 1 dwarf with gemcutting enabled. | |
| autolabor COOK 1 1 3: | |
| Keep 1 dwarf with cooking enabled, selected only from the top 3. | |
| autolabor FEED_WATER_CIVILIANS haulers: | |
| Have haulers feed and water wounded dwarves. | |
| autolabor CUTWOOD disable: | |
| Turn off autolabor for wood cutting. | |
By default, each labor is assigned to between 1 and 200 dwarves (2-200 for mining). By default 33% of the workforce become haulers, who handle all hauling jobs as well as cleaning, pulling levers, recovering wounded, removing constructions, and filling ponds. Other jobs are automatically assigned as described above. Each of these settings can be adjusted.
Jobs are rarely assigned to nobles with responsibilities for meeting diplomats or merchants, never to the chief medical dwarf, and less often to the bookeeper and manager.
Hunting is never assigned without a butchery, and fishing is nver assigned without a fishery.
For each labor a preference order is calculated based on skill, biased against masters of other trades and excluding those who can't do the job. The labor is then added to the best <minimum> dwarves for that labor. We assign at least the minimum number of dwarfs, in order of preference, and then assign additional dwarfs that meet any of these conditions:
- The dwarf is idle and there are no idle dwarves assigned to this labor
- The dwarf has nonzero skill associated with the labor
- The labor is mining, hunting, or woodcutting and the dwarf currently has it enabled.
We stop assigning dwarfs when we reach the maximum allowed.
Other
catsplosion
Makes cats just multiply. It is not a good idea to run this more than once or twice.
dfusion
This is the DFusion lua plugin system by Warmist, running as a DFHack plugin. There are two parts to this plugin: an interactive script that shows a text based menu and lua modules. Some of the functionality of is intentionaly left out of the menu:
| Friendship: | a binary plugin that allows multi race forts (to use make a script that imports plugins.dfusion.friendship and use Friendship:install{table} table should contain list of race names.) |
|---|---|
| Embark: | a binary plugin that allows multi race embark (to use make a script that imports plugins.dfusion.embark and use Embark:install{table} table should contain list of race names or list of pairs (race-name, caste_id)). |
See the bay12 thread for details: http://www.bay12forums.com/smf/index.php?topic=93317.0
Note
- Some of the DFusion plugins aren't completely ported yet. This can lead to crashes.
- The game will be suspended while you're using dfusion. Don't panic when it doesn't respond.
embark-tools
A collection of embark-related tools.
Usage:
embark-tools enable/disable tool [tool]...
Tools:
- anywhere: Allows embarking anywhere (including sites, mountain-only biomes, and oceans). Use with caution.
- nano: An implementation of nano embark - allows resizing below 2x2 when enabled.
- sand: Displays an indicator when sand is present in the currently-selected area, similar to the default clay/stone indicators.
- sticky: Maintains the selected local area while navigating the world map
petcapRemover
This plugin allows you to remove or raise the pet population cap. In vanilla DF, pets will not reproduce unless the population is below 50 and the number of children of that species is below a certain percentage. This plugin allows removing the second restriction and removing or raising the first. Pets still require PET or PET_EXOTIC tags in order to reproduce. Type help petcapRemover for exact usage. In order to make population more stable and avoid sudden population booms as you go below the raised population cap, this plugin counts pregnancies toward the new population cap. It can still go over, but only in the case of multiple births.
- petcapRemover
- cause pregnancies now and schedule the next check
- petcapRemover every n
- set how often in ticks the plugin checks for possible pregnancies
- petcapRemover cap n
- set the new cap to n. if n = 0, no cap
- petcapRemover pregtime n
- sets the pregnancy duration to n ticks. natural pregnancies are 300000 ticks for the current race and 200000 for everyone else
misery
When enabled, every new negative dwarven thought will be multiplied by a factor (2 by default).
Usage:
| misery enable n: | |
|---|---|
| enable misery with optional magnitude n. If specified, n must be positive. | |
| misery n: | same as "misery enable n" |
| misery enable: | same as "misery enable 2" |
| misery disable: | stop adding new negative thoughts. This will not remove existing duplicated thoughts. Equivalent to "misery 1" |
| misery clear: | remove fake thoughts added in this session of DF. Saving makes them permanent! Does not change factor. |
strangemood
Creates a strange mood job the same way the game itself normally does it.
Options:
| -force: | Ignore normal strange mood preconditions (no recent mood, minimum moodable population, artifact limit not reached). |
|---|---|
| -unit: | Make the strange mood strike the selected unit instead of picking one randomly. Unit eligibility is still enforced. |
| -type T: | Force the mood to be of a particular type instead of choosing randomly based on happiness. Valid values are "fey", "secretive", "possessed", "fell", and "macabre". |
| -skill S: | Force the mood to use a specific skill instead of choosing the highest moodable skill. Valid values are "miner", "carpenter", "engraver", "mason", "tanner", "weaver", "clothier", "weaponsmith", "armorsmith", "metalsmith", "gemcutter", "gemsetter", "woodcrafter", "stonecrafter", "metalcrafter", "glassmaker", "leatherworker", "bonecarver", "bowyer", and "mechanic". |
Known limitations: if the selected unit is currently performing a job, the mood will not be started.
log-region
When enabled in dfhack.init, each time a fort is loaded identifying information will be written to the gamelog. Assists in parsing the file if you switch between forts, and adds information for story-building.
Scripts
Lua or ruby scripts placed in the hack/scripts/ directory are considered for execution as if they were native DFHack commands. They are listed at the end of the 'ls' command output.
Note: scripts in subdirectories of hack/scripts/ can still be called, but will only be listed by ls if called as 'ls -a'. This is intended as a way to hide scripts that are obscure, developer-oriented, or should be used as keybindings.
Some notable scripts:
fix/*
Scripts in this subdirectory fix various bugs and issues, some of them obscure.
fix/blood-del
Makes it so that future caravans won't bring barrels full of blood, ichor, or goo.
fix/build-location
Fixes construction jobs that are stuck trying to build a wall while standing on the same exact tile (bug 5991), designates the tile restricted traffic to hopefully avoid jamming it again, and unsuspends them.
fix/cloth-stockpile
Fixes erratic behavior of cloth stockpiles by scanning material objects in memory and patching up some invalid reference fields. Needs to be run every time a save game is loaded; putting fix/cloth-stockpile enable in dfhack.init makes it run automatically.
fix/dead-units
Removes uninteresting dead units from the unit list. Doesn't seem to give any noticeable performance gain, but migrants normally stop if the unit list grows to around 3000 units, and this script reduces it back.
fix/feeding-timers
Reset the GiveWater and GiveFood timers of all units as appropriate.
fix/growth-bug
Fixes locally born units such that they will grow larger than their birth size. Note that this bug was fixed in DF version 0.40.02.
fix/item-occupancy
Diagnoses and fixes issues with nonexistant 'items occupying site', usually caused by autodump bugs or other hacking mishaps.
fix/population-cap
Run this after every migrant wave to ensure your population cap is not exceeded. The issue with the cap is that it is compared to the population number reported by the last caravan, so once it drops below the cap, migrants continue to come until that number is updated again.
fix/stable-temp
Instantly sets the temperature of all free-lying items to be in equilibrium with the environment and stops temperature updates. In order to maintain this efficient state however, use tweak stable-temp and tweak fast-heat.
gui/*
Scripts that implement dialogs inserted into the main game window are put in this directory.
gui/hack-wish
A graphical interface for creating items.
binpatch
Checks, applies or removes binary patches directly in memory at runtime:
binpatch check/apply/remove <patchname>
If the name of the patch has no extension or directory separators, the script uses hack/patches/<df-version>/<name>.dif, thus auto-selecting the version appropriate for the currently loaded executable.
create-items
Spawn arbitrary items under the cursor.
The first argument gives the item category, the second gives the material, and the optionnal third gives the number of items to create (defaults to 20).
Currently supported item categories: boulder, bar, plant, log, web.
Instead of material, using list makes the script list eligible materials.
The web item category will create an uncollected cobweb on the floor.
Note that the script does not enforce anything, and will let you create boulders of toad blood and stuff like that. However the list mode will only show 'normal' materials.
Examples:
create-items boulders COAL_BITUMINOUS 12
create-items plant tail_pig
create-items log list
create-items web CREATURE:SPIDER_CAVE_GIANT:SILK
create-items bar CREATURE:CAT:SOAP
create-items bar adamantine
digfort
A script to designate an area for digging according to a plan in csv format.
This script, inspired from quickfort, can designate an area for digging. Your plan should be stored in a .csv file like this:
# this is a comment
d;d;u;d;d;skip this tile;d
d;d;d;i
Available tile shapes are named after the 'dig' menu shortcuts: d for dig, u for upstairs, d downstairs, i updown, h channel, r upward ramp, x remove designation. Unrecognized characters are ignored (eg the 'skip this tile' in the sample).
Empty lines and data after a # are ignored as comments. To skip a row in your design, use a single ;.
One comment in the file may contain the phrase start(3,5). It is interpreted as an offset for the pattern: instead of starting at the cursor, it will start 3 tiles left and 5 tiles up from the cursor.
The script takes the plan filename, starting from the root df folder (where Dwarf Fortress.exe is found).
drain-aquifer
Remove all 'aquifer' tag from the map blocks. Irreversible.
deathcause
Focus a body part ingame, and this script will display the cause of death of the creature. Also works when selecting units from the 'u'nitlist viewscreen.
dfstatus
Show a quick overview of critical stock quantities, including food, dirnks, wood, and various bars.
embark
Allows to embark anywhere. Currently windows only.
exterminate
Kills any unit of a given race.
With no argument, lists the available races and count eligible targets.
With the special argument him, targets only the selected creature.
With the special argument undead, targets all undeads on the map, regardless of their race.
When specifying a race, a caste can be specified to further restrict the targeting. To do that, append and colon and the caste name after the race.
Any non-dead non-caged unit of the specified race gets its blood_count set to 0, which means immediate death at the next game tick. For creatures such as vampires, it also sets animal.vanish_countdown to 2.
An alternate mode is selected by adding a 2nd argument to the command, magma. In this case, a column of 7/7 magma is generated on top of the targets until they die (Warning: do not call on magma-safe creatures. Also, using this mode on birds is not recommanded.)
Will target any unit on a revealed tile of the map, including ambushers, but ignore caged/chained creatures.
Ex:
exterminate gob
exterminate gob:male
To kill a single creature, select the unit with the 'v' cursor and:
exterminate him
To purify all elves on the map with fire (may have side-effects):
exterminate elve magma
growcrops
Instantly grow seeds inside farming plots.
With no argument, this command list the various seed types currently in use in your farming plots. With a seed type, the script will grow 100 of these seeds, ready to be harvested. You can change the number with a 2nd argument.
For example, to grow 40 plump helmet spawn:
growcrops plump 40
lever
Allow manipulation of in-game levers from the dfhack console.
Can list levers, including state and links, with:
lever list
To queue a job so that a dwarf will pull the lever 42, use lever pull 42. This is the same as 'q'uerying the building and queue a 'P'ull request.
To magically toggle the lever immediately, use:
lever pull 42 --now
locate-ore
Scan the map for metal ores.
Finds and designate for digging one tile of a specific metal ore. Only works for native metal ores, does not handle reaction stuff (eg STEEL).
When invoked with the list argument, lists metal ores available on the map.
Examples:
locate-ore list
locate-ore hematite
locate-ore iron
lua
There are the following ways to invoke this command:
lua (without any parameters)
This starts an interactive lua interpreter.
lua -f "filename" or lua --file "filename"
This loads and runs the file indicated by filename.
lua -s ["filename"] or lua --save ["filename"]
This loads and runs the file indicated by filename from the save directory. If the filename is not supplied, it loads "dfhack.lua".
:lua lua statement...
Parses and executes the lua statement like the interactive interpreter would.
masspit
Designate all creatures in cages on top of a pit/pond activity zone for pitting. Works best with an animal stockpile on top of the zone.
Works with a zone number as argument (eg Activity Zone #6 -> masspit 6) or with the game cursor on top of the area.
multicmd
Run multiple dfhack commands. The argument is split around the character ; and all parts are run sequencially as independent dfhack commands. Useful for hotkeys.
Example:
multicmd locate-ore iron ; digv
quicksave
If called in dwarf mode, makes DF immediately auto-save the game by setting a flag normally used in seasonal auto-save.
remove-stress
Sets stress to -1,000,000; the normal range is 0 to 500,000 with very stable or very stressed dwarves taking on negative or greater values respectively. Applies to the selected unit, or use "remove-stress -all" to apply to all units.
setfps
Run setfps <number> to set the FPS cap at runtime, in case you want to watch combat in slow motion or something :)
siren
Wakes up sleeping units, cancels breaks and stops parties either everywhere, or in the burrows given as arguments. In return, adds bad thoughts about noise, tiredness and lack of protection. Also, the units with interrupted breaks will go on break again a lot sooner. The script is intended for emergencies, e.g. when a siege appears, and all your military is partying.
soundsense-season
It is a well known issue that Soundsense cannot detect the correct current season when a savegame is loaded and has to play random season music until a season switch occurs.
This script registers a hook that prints the appropriate string to gamelog.txt on every map load to fix this. For best results call the script from dfhack.init.
source
Create an infinite magma or water source or drain on a tile.
This script registers a map tile as a liquid source, and every 12 game ticks that tile receives or remove 1 new unit of flow based on the configuration.
Place the game cursor where you want to create the source (must be a flow-passable tile, and not too high in the sky) and call:
source add [magma|water] [0-7]
The number argument is the target liquid level (0 = drain, 7 = source).
To add more than 1 unit everytime, call the command again on the same spot.
To delete one source, place the cursor over its tile and use delete. To remove all existing sources, call source clear.
The list argument shows all existing sources.
Ex:
source add water     - water source
source add magma 7   - magma source
source add water 0   - water drain
superdwarf
Similar to fastdwarf, per-creature.
To make any creature superfast, target it ingame using 'v' and:
superdwarf add
Other options available: del, clear, list.
This plugin also shortens the 'sleeping' and 'on break' periods of targets.
stripcaged
For dumping items inside cages. Will mark selected items for dumping, then a dwarf may come and actually dump it. See also autodump.
With the items argument, only dumps items laying in the cage, excluding stuff worn by caged creatures. weapons will dump worn weapons, armor will dump everything worn by caged creatures (including armor and clothing), and all will dump everything, on a creature or not.
stripcaged list will display on the dfhack console the list of all cages and their item content.
Without further arguments, all commands work on all cages and animal traps on the map. With the here argument, considers only the in-game selected cage (or the cage under the game cursor). To target only specific cages, you can alternatively pass cage IDs as arguments:
stripcaged weapons 25321 34228
teleport
Teleports a unit to given coordinates.
Examples:
teleport -showunitid                 - prints unitid beneath cursor
teleport -showpos                    - prints coordinates beneath cursor
teleport -unit 1234 -x 56 -y 115 -z 26  - teleports unit 1234 to 56,115,26
undump-buildings
Undesignates building base materials for dumping.
modtools
These scripts are mostly useful for raw modders and scripters. They all have standard arguments: arguments are of the form tool -argName1 argVal1 -argName2 argVal2. This is equivalent to tool -argName2 argVal2 -argName1 argVal1. It is not necessary to provide a value to an argument name: tool -argName3 is fine. Supplying the same argument name multiple times will result in an error. Argument names are preceded with a dash. The -help argument will print a descriptive usage string describing the nature of the arguments. For multiple word argument values, brackets must be used: tool -argName4 [ sadf1 sadf2 sadf3 ]. In order to allow passing literal braces as part of the argument, backslashes are used: tool -argName4 [ \] asdf \foo ] sets argName4 to \] asdf foo. The *-trigger scripts have a similar policy with backslashes.
add-syndrome
This allows adding and removing syndromes from units.
anonymous-script
This allows running a short simple Lua script passed as an argument instead of running a script from a file. This is useful when you want to do something too complicated to make with the existing modtools, but too simple to be worth its own script file.
create-item
This is mostly the same as the other create item tools, but it uses standard arguments. The other versions will be phased out in a later version.
force
This tool triggers events like megabeasts, caravans, invaders, and migrants.
interaction-trigger
This triggers events when a unit uses an interaction on another. It works by scanning the announcements for the correct attack verb, so the attack verb must be specified in the interaction. It includes an option to suppress this announcement after it finds it.
invader-item-destroyer
This tool configurably destroys invader items to prevent clutter or to prevent the player from getting tools exclusive to certain races.
item-trigger
This powerful tool triggers DFHack commands when a unit equips, unequips, or attacks another unit with specified item types, specified item materials, or specified item contaminants.
moddable-gods
This is a standardized version of Putnam's moddableGods script. It allows you to create gods on the command-line.
outside-only
This allows you to specify certain custom buildings as outside only, or inside only. If the player attempts to build a building in an inappropriate location, the building will be destroyed.
projectile-trigger
This triggers dfhack commands when projectiles hit their targets.
random-trigger
This triggers random dfhack commands with specified probabilities.
reaction-trigger
Triggers dfhack commands when custom reactions complete.
reaction-trigger-transition
Scans raw files and creates a file to help modders transition from autoSyndrome to reaction-trigger.
skill-change
Sets or modifies a skill of a unit.
spawn-flow
Creates flows at the specified location.
syndrome-trigger
Triggers dfhack commands when syndromes are applied to units.
transform-unit
Transforms a unit into another unit type, possibly permanently.
In-game interface tools
These tools work by displaying dialogs or overlays in the game window, and are mostly implemented by lua scripts.
Note
In order to avoid user confusion, as a matter of policy all these tools display the word "DFHack" on the screen somewhere while active.
When that is not appropriate because they merely add keybinding hints to existing DF screens, they deliberately use red instead of green for the key.
As an exception, the tweak plugin described above does not follow this guideline because it arguably just fixes small usability bugs in the game UI.
All of these tools are disabled by default - in order to make them available, you must enable the plugins which provide them.
Dwarf Manipulator
Implemented by the 'manipulator' plugin.
To activate, open the unit screen and press 'l'.
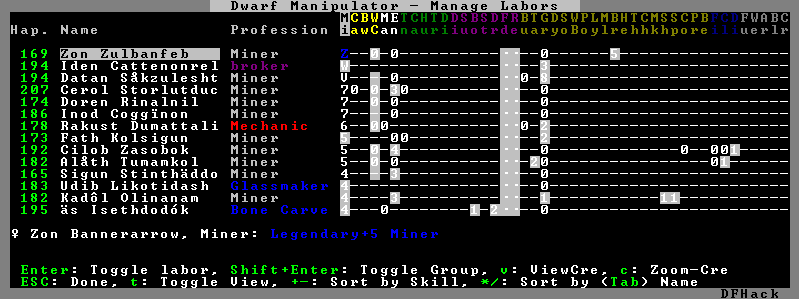
This tool implements a Dwarf Therapist-like interface within the game UI. The far left column displays the unit's Happiness (color-coded based on its value), Name, Profession/Squad, and the right half of the screen displays each dwarf's labor settings and skill levels (0-9 for Dabbling thru Professional, A-E for Great thru Grand Master, and U-Z for Legendary thru Legendary+5).
Cells with teal backgrounds denote skills not controlled by labors, e.g. military and social skills.
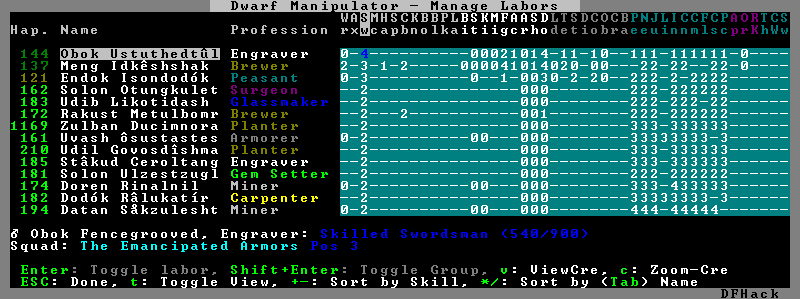
Press t to toggle between Profession and Squad view.
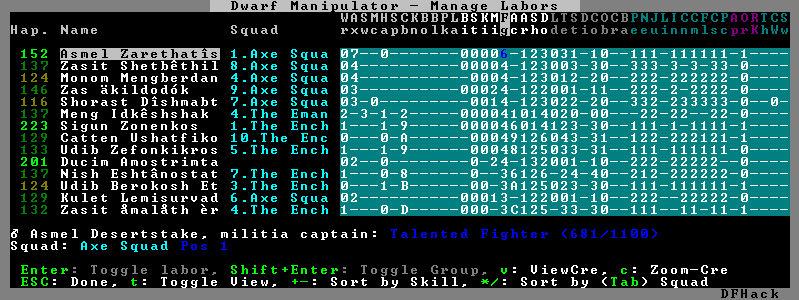
Use the arrow keys or number pad to move the cursor around, holding Shift to move 10 tiles at a time.
Press the Z-Up (<) and Z-Down (>) keys to move quickly between labor/skill categories. The numpad Z-Up and Z-Down keys seek to the first or last unit in the list. Backspace seeks to the top left corner.
Press Enter to toggle the selected labor for the selected unit, or Shift+Enter to toggle all labors within the selected category.
Press the +- keys to sort the unit list according to the currently selected skill/labor, and press the */ keys to sort the unit list by Name, Profession/Squad, Happiness, or Arrival order (using Tab to select which sort method to use here).
With a unit selected, you can press the "v" key to view its properties (and possibly set a custom nickname or profession) or the "c" key to exit Manipulator and zoom to its position within your fortress.
The following mouse shortcuts are also available:
- Click on a column header to sort the unit list. Left-click to sort it in one direction (descending for happiness or labors/skills, ascending for name, profession or squad) and right-click to sort it in the opposite direction.
- Left-click on a labor cell to toggle that labor. Right-click to move the cursor onto that cell instead of toggling it.
- Left-click on a unit's name, profession or squad to view its properties.
- Right-click on a unit's name, profession or squad to zoom to it.
Pressing ESC normally returns to the unit screen, but Shift-ESC would exit directly to the main dwarf mode screen.
Search
Implemented by the 'search' plugin.
The search plugin adds search to the Stocks, Animals, Trading, Stockpile, Noble (assignment candidates), Military (position candidates), Burrows (unit list), Rooms, Announcements, Job List and Unit List screens.

Searching works the same way as the search option in "Move to Depot" does. You will see the Search option displayed on screen with a hotkey (usually 's'). Pressing it lets you start typing a query and the relevant list will start filtering automatically.
Pressing ENTER, ESC or the arrow keys will return you to browsing the now filtered list, which still functions as normal. You can clear the filter by either going back into search mode and backspacing to delete it, or pressing the "shifted" version of the search hotkey while browsing the list (e.g. if the hotkey is 's', then hitting 'shift-s' will clear any filter).
Leaving any screen automatically clears the filter.
In the Trade screen, the actual trade will always only act on items that are actually visible in the list; the same effect applies to the Trade Value numbers displayed by the screen. Because of this, the 't' key is blocked while search is active, so you have to reset the filters first. Pressing Alt-C will clear both search strings.
In the stockpile screen the option only appears if the cursor is in the rightmost list:
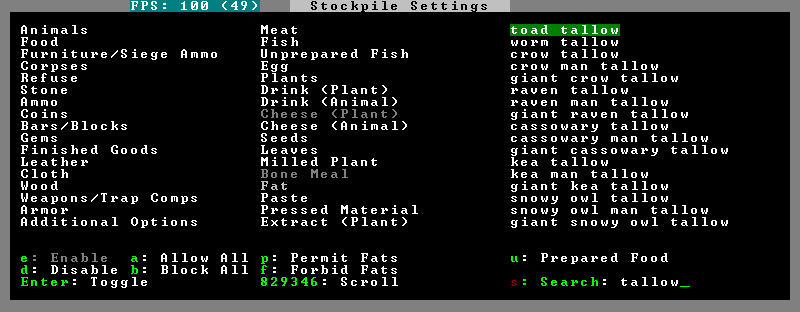
Note that the 'Permit XXX'/'Forbid XXX' keys conveniently operate only on items actually shown in the rightmost list, so it is possible to select only fat or tallow by forbidding fats, then searching for fat/tallow, and using Permit Fats again while the list is filtered.
AutoMaterial
Implemented by the 'automaterial' plugin.
This makes building constructions (walls, floors, fortifications, etc) a little bit easier by saving you from having to trawl through long lists of materials each time you place one.
Firstly, it moves the last used material for a given construction type to the top of the list, if there are any left. So if you build a wall with chalk blocks, the next time you place a wall the chalk blocks will be at the top of the list, regardless of distance (it only does this in "grouped" mode, as individual item lists could be huge). This should mean you can place most constructions without having to search for your preferred material type.
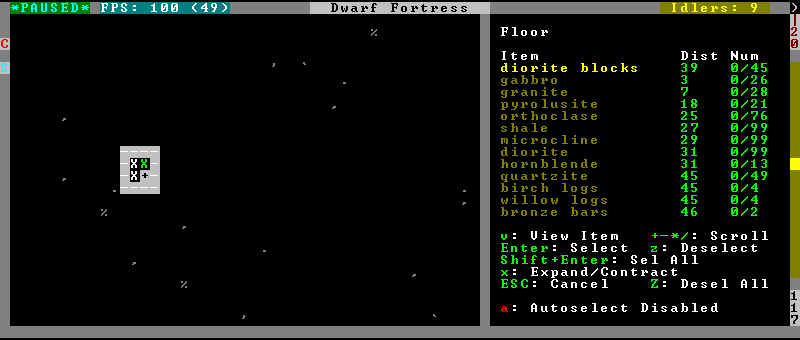
Pressing 'a' while highlighting any material will enable that material for "auto select" for this construction type. You can enable multiple materials as autoselect. Now the next time you place this type of construction, the plugin will automatically choose materials for you from the kinds you enabled. If there is enough to satisfy the whole placement, you won't be prompted with the material screen - the construction will be placed and you will be back in the construction menu as if you did it manually.
When choosing the construction placement, you will see a couple of options:
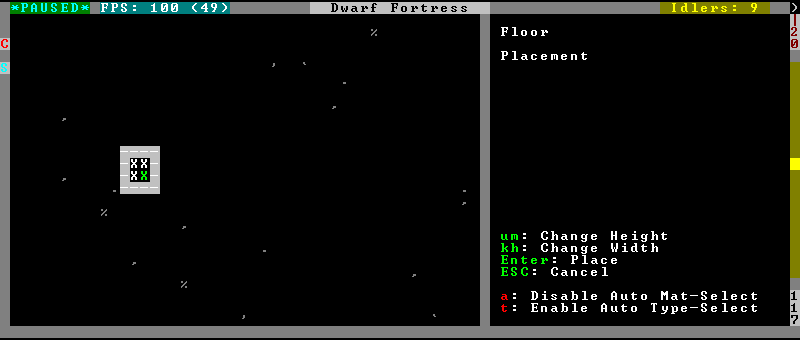
Use 'a' here to temporarily disable the material autoselection, e.g. if you need to go to the material selection screen so you can toggle some materials on or off.
The other option (auto type selection, off by default) can be toggled on with 't'. If you toggle this option on, instead of returning you to the main construction menu after selecting materials, it returns you back to this screen. If you use this along with several autoselect enabled materials, you should be able to place complex constructions more conveniently.
Stockpile Automation
Enable the automelt or autotrade plugins in your dfhack.init with:
enable automelt
enable autotrade
When querying a stockpile, options will appear to toggle automelt and/or autotrade for this stockpile. When automelt is enabled for a stockpile, any meltable items placed in it will be designated to be melted. When autotrade is enabled for a stockpile, any items placed in it will be designated to be taken to the Trade Depot whenever merchants are on the map.
gui/advfort
This script allows to perform jobs in adventure mode. For more complete help press '?' while script is running. It's most confortable to use this as a keybinding. (e.g. keybinding set Ctrl-T gui/advfort). Possible arguments:
- -a or --nodfassign - uses different method to assign items.
- -i or --inventory - checks inventory for possible items to use in the job.
- -c or --cheat - relaxes item requirements for buildings (e.g. walls from bones). implies -a
- job - selects that job (e.g. Dig or FellTree)
An example of player digging in adventure mode:
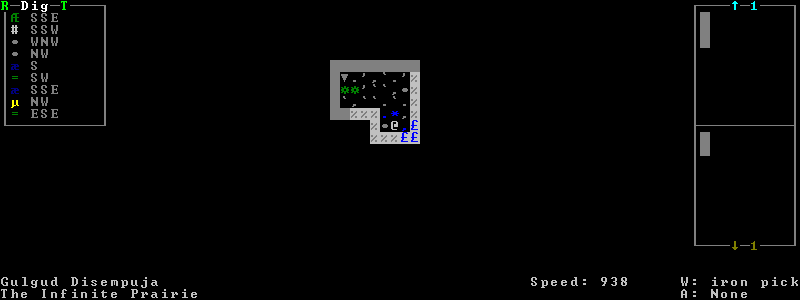
DISCLAIMER
advfort changes only persist in non procedural sites. Namely: player forts, caves, camps.
gui/assign-rack
Bind to a key (the example config uses P), and activate when viewing a weapon rack in the 'q' mode.
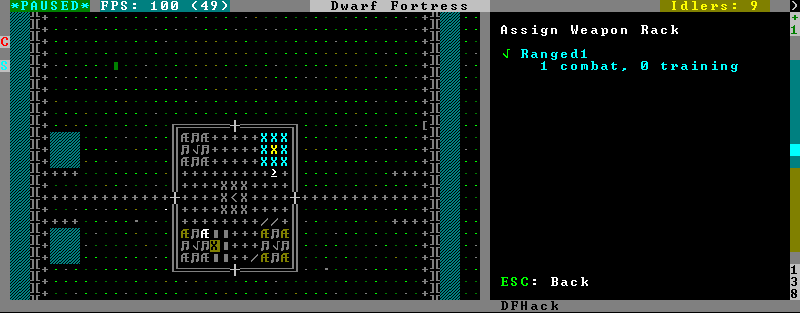
This script is part of a group of related fixes to make the armory storage work again. The existing issues are:
- Weapon racks have to each be assigned to a specific squad, like with beds/boxes/armor stands and individual squad members, but nothing in the game does this. This issue is what this script addresses.
- Even if assigned by the script, the game will unassign the racks again without a binary patch. This patch is called weaponrack-unassign, and can be applied via the binpatch program, or the matching script. See this for more info about the bug: http://www.bay12games.com/dwarves/mantisbt/view.php?id=1445
- Haulers still take equpment stored in the armory away to the stockpiles, unless the fix-armory plugin above is used.
The script interface simply lets you designate one of the squads that are assigned to the barracks/armory containing the selected stand as the intended user. In order to aid in the choice, it shows the number of currently assigned racks for every valid squad.
gui/choose-weapons
Bind to a key (the example config uses Ctrl-W), and activate in the Equip->View/Customize page of the military screen.
Depending on the cursor location, it rewrites all 'individual choice weapon' entries in the selected squad or position to use a specific weapon type matching the assigned unit's top skill. If the cursor is in the rightmost list over a weapon entry, it rewrites only that entry, and does it even if it is not 'individual choice'.
Rationale: individual choice seems to be unreliable when there is a weapon shortage, and may lead to inappropriate weapons being selected.
gui/clone-uniform
Bind to a key (the example config uses Ctrl-C), and activate in the Uniforms page of the military screen with the cursor in the leftmost list.
When invoked, the script duplicates the currently selected uniform template, and selects the newly created copy.
gui/companion-order
A script to issue orders for companions. Select companions with lower case chars, issue orders with upper case. Must be in look or talk mode to issue command on tile.
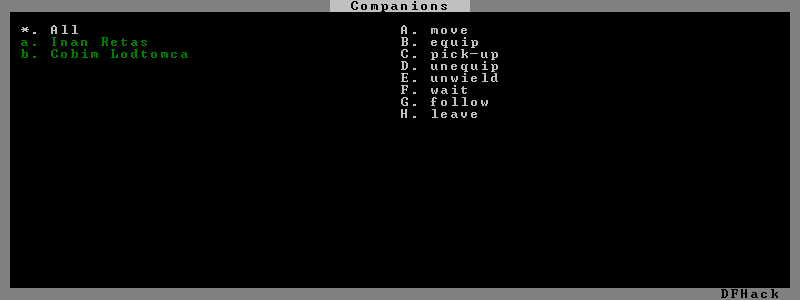
- move - orders selected companions to move to location. If companions are following they will move no more than 3 tiles from you.
- equip - try to equip items on the ground.
- pick-up - try to take items into hand (also wield)
- unequip - remove and drop equipment
- unwield - drop held items
- wait - temporarily remove from party
- follow - rejoin the party after "wait"
- leave - remove from party (can be rejoined by talking)
gui/gm-editor
There are three ways to open this editor:
- using gui/gm-editor command/keybinding - opens editor on what is selected or viewed (e.g. unit/item description screen)
- using gui/gm-editor <lua command> - executes lua command and opens editor on its results (e.g. gui/gm-editor "df.global.world.items.all" shows all items)
- using gui/gm-editor dialog - shows an in game dialog to input lua command. Works the same as version above.
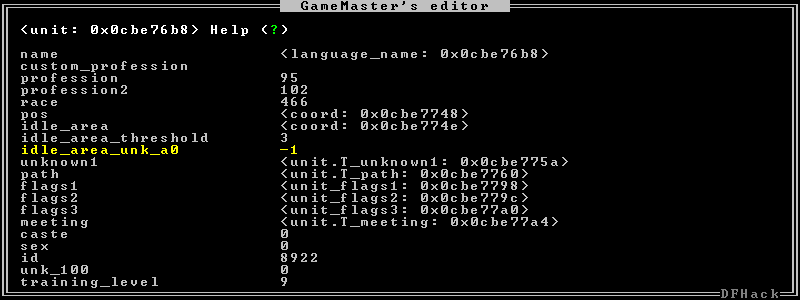
This editor allows to change and modify almost anything in df. Press '?' for an in-game help.
Hotkeys
Opens an in-game screen showing DFHack keybindings that are valid in the current mode.
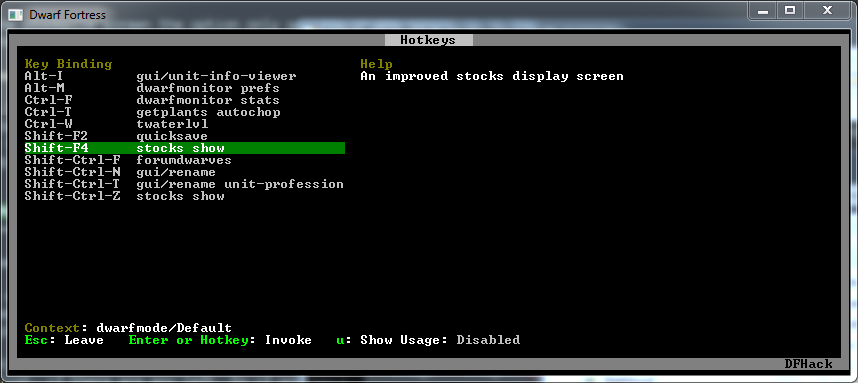
Type hotkeys into the DFHack console to open the screen, or bind the command to a globally active hotkey in dfhack.init, e.g.:
keybinding add Ctrl-F1 hotkeys
Hotkeys
Opens an in-game screen showing DFHack keybindings that are valid in the current mode.

Type hotkeys into the DFHack console to open the screen, or bind the command to a globally active hotkey in dfhack.init, e.g.:
keybinding add Ctrl-F1 hotkeys
Stockpile Automation
- Enable the autodump plugin in your dfhack.init with
- enable autodump
When querying a stockpile an option will appear to toggle autodump for this stockpile. Any items placed in this stockpile will be designated to be dumped.
Stockpile Automation
- Enable the automelt plugin in your dfhack.init with
- enable automelt
When querying a stockpile an option will appear to toggle automelt for this stockpile. Any items placed in this stockpile will be designated to be melted.
gui/liquids
To use, bind to a key (the example config uses Alt-L) and activate in the 'k' mode.
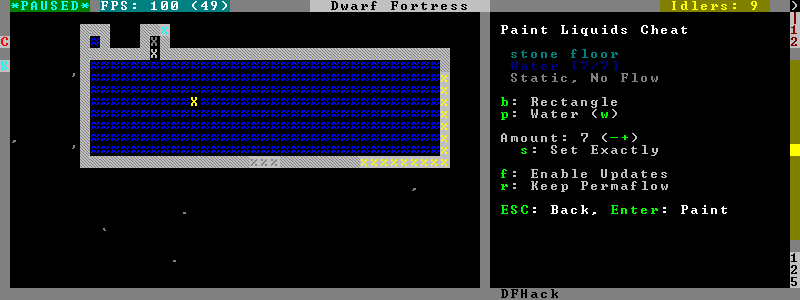
This script is a gui front-end to the liquids plugin and works similar to it, allowing you to add or remove water & magma, and create obsidian walls & floors. Note that there is no undo support, and that bugs in this plugin have been known to create pathfinding problems and heat traps.
The b key changes how the affected area is selected. The default Rectangle mode works by selecting two corners like any ordinary designation. The p key chooses between adding water, magma, obsidian walls & floors, or just tweaking flags.
When painting liquids, it is possible to select the desired level with +-, and choose between setting it exactly, only increasing or only decreasing with s.
In addition, f allows disabling or enabling the flowing water computations for an area, and r operates on the "permanent flow" property that makes rivers power water wheels even when full and technically not flowing.
After setting up the desired operations using the described keys, use Enter to apply them.
gui/mechanisms
To use, bind to a key (the example config uses Ctrl-M) and activate in the 'q' mode.
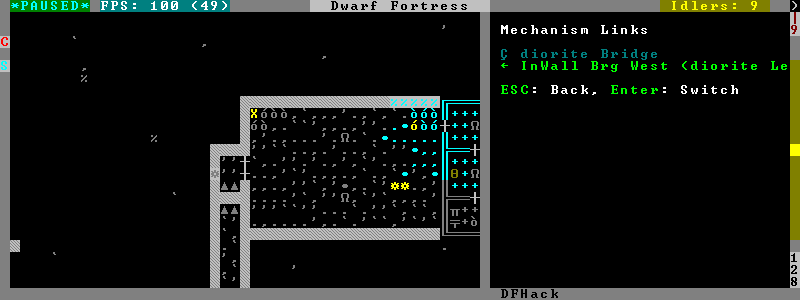
Lists mechanisms connected to the building, and their links. Navigating the list centers the view on the relevant linked buildings.
To exit, press ESC or Enter; ESC recenters on the original building, while Enter leaves focus on the current one. Shift-Enter has an effect equivalent to pressing Enter, and then re-entering the mechanisms ui.
gui/mod-manager
A way to simply install and remove small mods. It looks for specially formatted mods in df subfolder 'mods'. Mods are not included, for example mods see: github mini mod repository
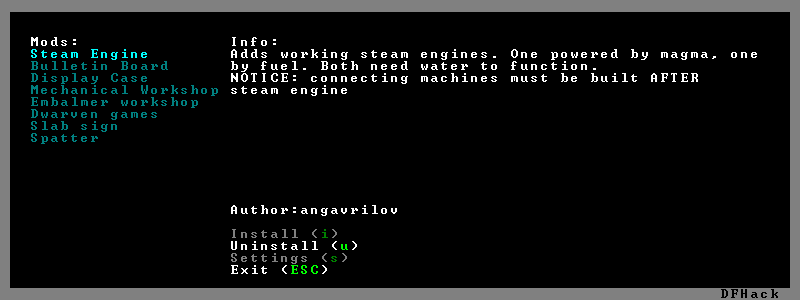
gui/rename
Backed by the rename plugin, this script allows entering the desired name via a simple dialog in the game ui.
gui/rename [building] in 'q' mode changes the name of a building.
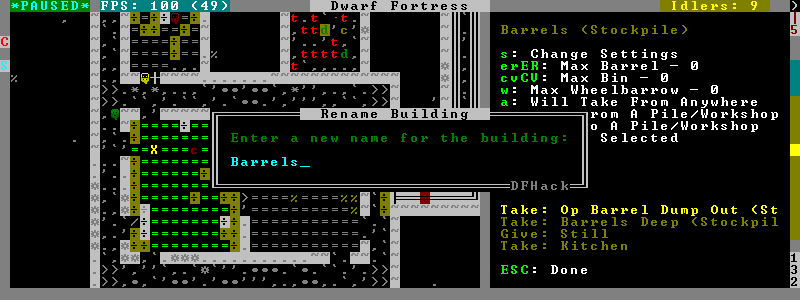
The selected building must be one of stockpile, workshop, furnace, trap, or siege engine. It is also possible to rename zones from the 'i' menu.
gui/rename [unit] with a unit selected changes the nickname.
Unlike the built-in interface, this works even on enemies and animals.
gui/rename unit-profession changes the selected unit's custom profession name.
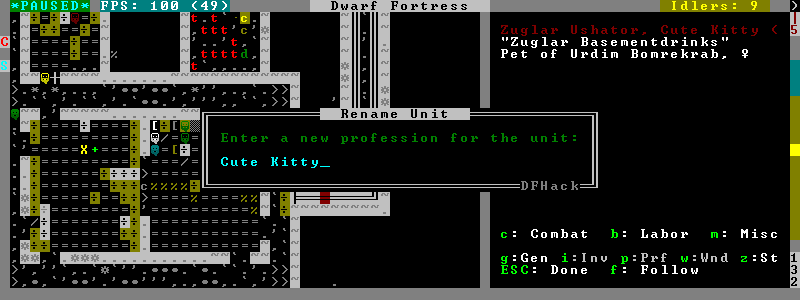
Likewise, this can be applied to any unit, and when used on animals it overrides their species string.
The building or unit options are automatically assumed when in relevant ui state.
The example config binds building/unit rename to Ctrl-Shift-N, and unit profession change to Ctrl-Shift-T.
gui/room-list
To use, bind to a key (the example config uses Alt-R) and activate in the 'q' mode, either immediately or after opening the assign owner page.
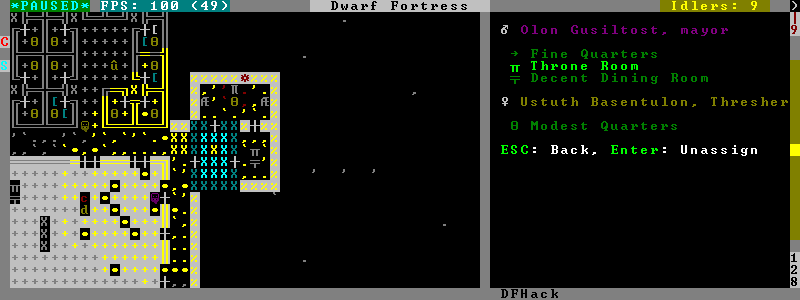
The script lists other rooms owned by the same owner, or by the unit selected in the assign list, and allows unassigning them.
gui/guide-path
Bind to a key (the example config uses Alt-P), and activate in the Hauling menu with the cursor over a Guide order.
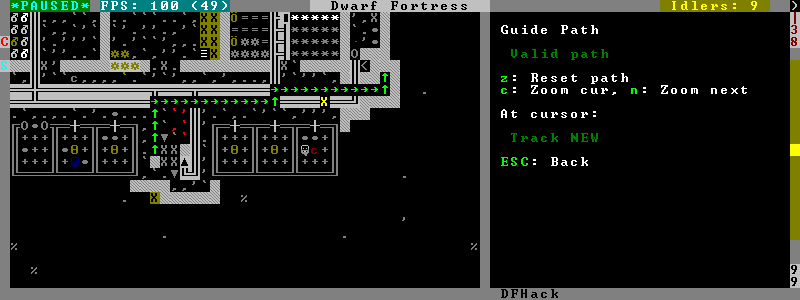
The script displays the cached path that will be used by the order; the game computes it when the order is executed for the first time.
gui/workflow
Bind to a key (the example config uses Alt-W), and activate with a job selected in a workshop in the 'q' mode.

This script provides a simple interface to constraints managed by the workflow plugin. When active, it displays a list of all constraints applicable to the current job, and their current status.
A constraint specifies a certain range to be compared against either individual item or whole stack count, an item type and optionally a material. When the current count is below the lower bound of the range, the job is resumed; if it is above or equal to the top bound, it will be suspended. Within the range, the specific constraint has no effect on the job; others may still affect it.
Pressing 'I' switches the current constraint between counting stacks or items. Pressing 'R' lets you input the range directly; 'e', 'r', 'd', 'f' adjust the bounds by 5, 10, or 20 depending on the direction and the 'I' setting (counting items and expanding the range each gives a 2x bonus).
Pressing 'A' produces a list of possible outputs of this job as guessed by workflow, and lets you create a new constraint by choosing one as template. If you don't see the choice you want in the list, it likely means you have to adjust the job material first using job item-material or gui/workshop-job, as described in workflow documentation above. In this manner, this feature can be used for troubleshooting jobs that don't match the right constraints.
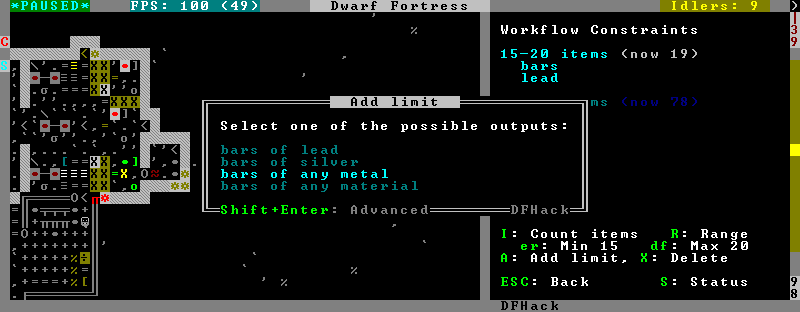
If you select one of the outputs with Enter, the matching constraint is simply added to the list. If you use Shift-Enter, the interface proceeds to the next dialog, which allows you to edit the suggested constraint parameters to suit your need, and set the item count range.
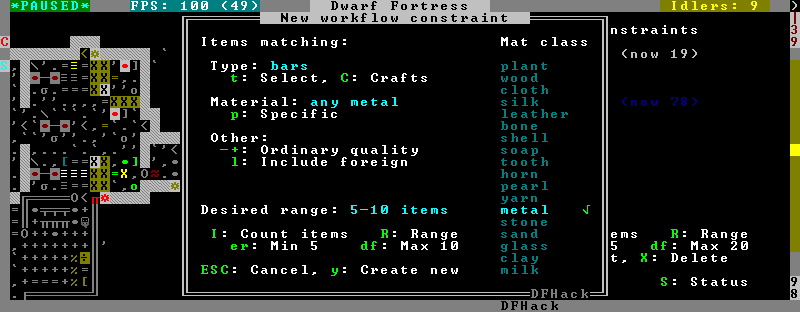
Pressing 'S' (or, with the example config, Alt-W in the 'z' stocks screen) opens the overall status screen, which was copied from the C++ implementation by falconne for better integration with the rest of the lua script:
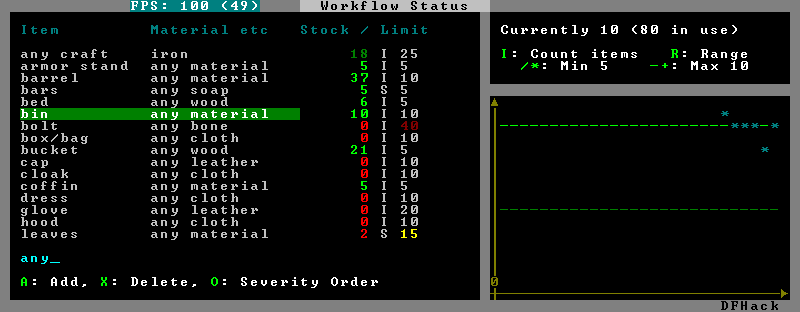
This screen shows all currently existing workflow constraints, and allows monitoring and/or changing them from one screen. The constraint list can be filtered by typing text in the field below.
The color of the stock level number indicates how "healthy" the stock level is, based on current count and trend. Bright green is very good, green is good, red is bad, bright red is very bad.
The limit number is also color-coded. Red means that there are currently no workshops producing that item (i.e. no jobs). If it's yellow, that means the production has been delayed, possibly due to lack of input materials.
The chart on the right is a plot of the last 14 days (28 half day plots) worth of stock history for the selected item, with the rightmost point representing the current stock value. The bright green dashed line is the target limit (maximum) and the dark green line is that minus the gap (minimum).
gui/workshop-job
Bind to a key (the example config uses Alt-A), and activate with a job selected in a workshop in the 'q' mode.
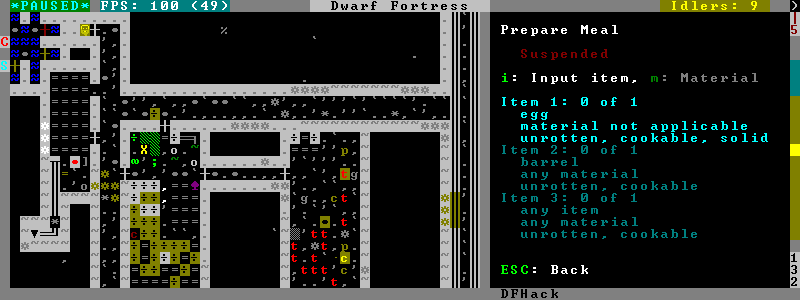
The script shows a list of the input reagents of the selected job, and allows changing them like the job item-type and job item-material commands.
Specifically, pressing the 'i' key pops up a dialog that lets you select an item type from a list.

Pressing 'm', unless the item type does not allow a material, lets you choose a material.
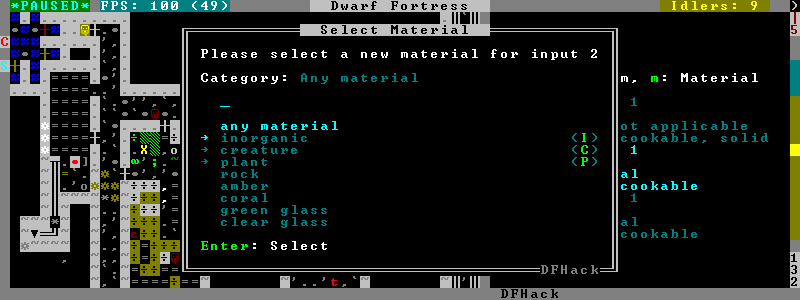
Since there are a lot more materials than item types, this dialog is more complex and uses a hierarchy of sub-menus. List choices that open a sub-menu are marked with an arrow on the left.
Warning
Due to the way input reagent matching works in DF, you must select an item type if you select a material, or the material will be matched incorrectly in some cases. If you press 'm' without choosing an item type, the script will auto-choose it if there is only one valid choice, or pop up an error message box instead of the material selection dialog.
Note that both materials and item types presented in the dialogs are filtered by the job input flags, and even the selected item type for material selection, or material for item type selection. Many jobs would let you select only one input item type.
For example, if you choose a plant input item type for your prepare meal job, it will only let you select cookable materials.
If you choose a barrel item instead (meaning things stored in barrels, like drink or milk), it will let you select any material, since in this case the material is matched against the barrel itself. Then, if you select, say, iron, and then try to change the input item type, now it won't let you select plant; you have to unset the material first.
Behavior Mods
These plugins, when activated via configuration UI or by detecting certain structures in RAWs, modify the game engine behavior concerning the target objects to add features not otherwise present.
DISCLAIMER
The plugins in this section have mostly been created for fun as an interesting technical challenge, and do not represent any long-term plans to produce more similar modifications of the game.
Siege Engine
The siege-engine plugin enables siege engines to be linked to stockpiles, and aimed at an arbitrary rectangular area across Z levels, instead of the original four directions. Also, catapults can be ordered to load arbitrary objects, not just stones.
Rationale
Siege engines are a very interesting feature, but sadly almost useless in the current state because they haven't been updated since 2D and can only aim in four directions. This is an attempt to bring them more up to date until Toady has time to work on it. Actual improvements, e.g. like making siegers bring their own, are something only Toady can do.
Configuration UI
The configuration front-end to the plugin is implemented by the gui/siege-engine script. Bind it to a key (the example config uses Alt-A) and activate after selecting a siege engine in 'q' mode.
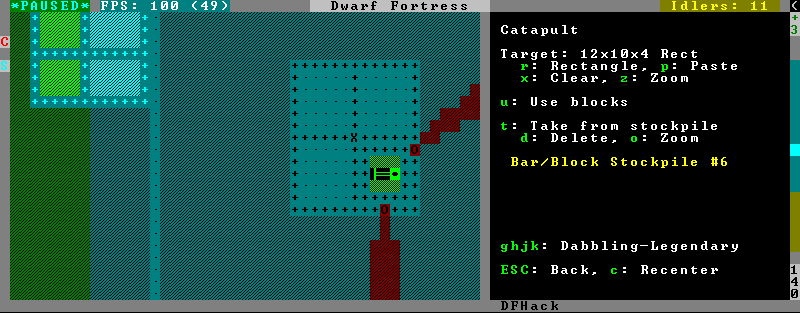
The main mode displays the current target, selected ammo item type, linked stockpiles and the allowed operator skill range. The map tile color is changed to signify if it can be hit by the selected engine: green for fully reachable, blue for out of range, red for blocked, yellow for partially blocked.
Pressing 'r' changes into the target selection mode, which works by highlighting two points with Enter like all designations. When a target area is set, the engine projectiles are aimed at that area, or units within it (this doesn't actually change the original aiming code, instead the projectile trajectory parameters are rewritten as soon as it appears).
After setting the target in this way for one engine, you can 'paste' the same area into others just by pressing 'p' in the main page of this script. The area to paste is kept until you quit DF, or select another area manually.
Pressing 't' switches to a mode for selecting a stockpile to take ammo from.
Exiting from the siege engine script via ESC reverts the view to the state prior to starting the script. Shift-ESC retains the current viewport, and also exits from the 'q' mode to main menu.
Power Meter
The power-meter plugin implements a modified pressure plate that detects power being supplied to gear boxes built in the four adjacent N/S/W/E tiles.
The configuration front-end is implemented by the gui/power-meter script. Bind it to a key (the example config uses Ctrl-Shift-M) and activate after selecting Pressure Plate in the build menu.
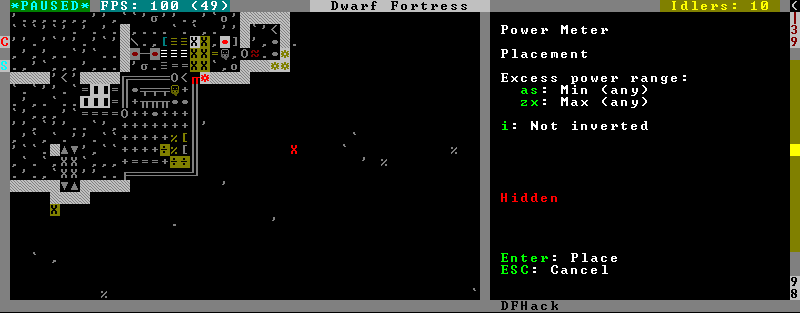
The script follows the general look and feel of the regular pressure plate build configuration page, but configures parameters relevant to the modded power meter building.
Steam Engine
The steam-engine plugin detects custom workshops with STEAM_ENGINE in their token, and turns them into real steam engines.
Rationale
The vanilla game contains only water wheels and windmills as sources of power, but windmills give relatively little power, and water wheels require flowing water, which must either be a real river and thus immovable and limited in supply, or actually flowing and thus laggy.
Steam engines are an alternative to water reactors that actually makes sense, and hopefully doesn't lag. Also, unlike e.g. animal treadmills, it can be done just by combining existing features of the game engine in a new way with some glue code and a bit of custom logic.
Construction
The workshop needs water as its input, which it takes via a passable floor tile below it, like usual magma workshops do. The magma version also needs magma.
ISSUE
Since this building is a machine, and machine collapse code cannot be hooked, it would collapse over true open space. As a loophole, down stair provides support to machines, while being passable, so use them.
After constructing the building itself, machines can be connected to the edge tiles that look like gear boxes. Their exact position is extracted from the workshop raws.
ISSUE
Like with collapse above, part of the code involved in machine connection cannot be hooked. As a result, the workshop can only immediately connect to machine components built AFTER it. This also means that engines cannot be chained without intermediate short axles that can be built later than both of the engines.
Operation
In order to operate the engine, queue the Stoke Boiler job (optionally on repeat). A furnace operator will come, possibly bringing a bar of fuel, and perform it. As a result, a "boiling water" item will appear in the 't' view of the workshop.
Note
The completion of the job will actually consume one unit of the appropriate liquids from below the workshop. This means that you cannot just raise 7 units of magma with a piston and have infinite power. However, liquid consumption should be slow enough that water can be supplied by a pond zone bucket chain.
Every such item gives 100 power, up to a limit of 300 for coal, and 500 for a magma engine. The building can host twice that amount of items to provide longer autonomous running. When the boiler gets filled to capacity, all queued jobs are suspended; once it drops back to 3+1 or 5+1 items, they are re-enabled.
While the engine is providing power, steam is being consumed. The consumption speed includes a fixed 10% waste rate, and the remaining 90% are applied proportionally to the actual load in the machine. With the engine at nominal 300 power with 150 load in the system, it will consume steam for actual 300*(10% + 90%*150/300) = 165 power.
Masterpiece mechanism and chain will decrease the mechanical power drawn by the engine itself from 10 to 5. Masterpiece barrel decreases waste rate by 4%. Masterpiece piston and pipe decrease it by further 4%, and also decrease the whole steam use rate by 10%.
Explosions
The engine must be constructed using barrel, pipe and piston from fire-safe, or in the magma version magma-safe metals.
During operation weak parts get gradually worn out, and eventually the engine explodes. It should also explode if toppled during operation by a building destroyer, or a tantruming dwarf.
Save files
It should be safe to load and view engine-using fortresses from a DF version without DFHack installed, except that in such case the engines won't work. However actually making modifications to them, or machines they connect to (including by pulling levers), can easily result in inconsistent state once this plugin is available again. The effects may be as weird as negative power being generated.
Add Spatter
This plugin makes reactions with names starting with SPATTER_ADD_ produce contaminants on the items instead of improvements. The produced contaminants are immune to being washed away by water or destroyed by the clean items command.
The plugin is intended to give some use to all those poisons that can be bought from caravans. :)
To be really useful this needs patches from bug 808, tweak fix-dimensions and tweak advmode-contained.